Exocet Motor
#1
Time for some updates. I didn't want to do a build thread. They get to be very long for a project like this. And specific information can be hard to find.
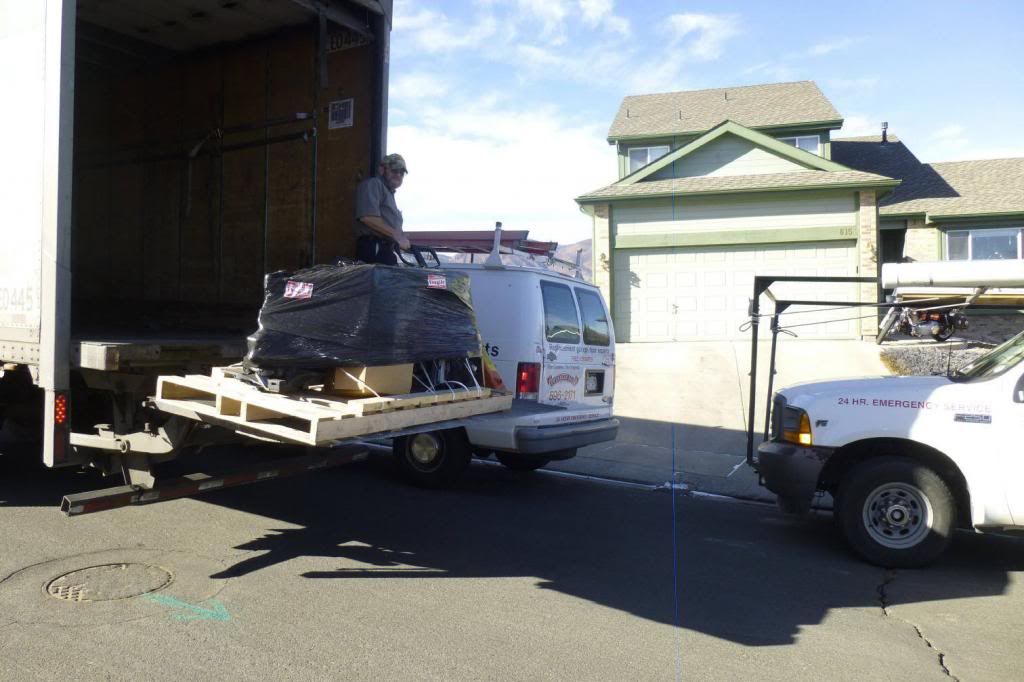
I chose an LS1 for a lot of reasons. They're readily available, and inexpensive. I had the whole palate delivered to my house for $4K.
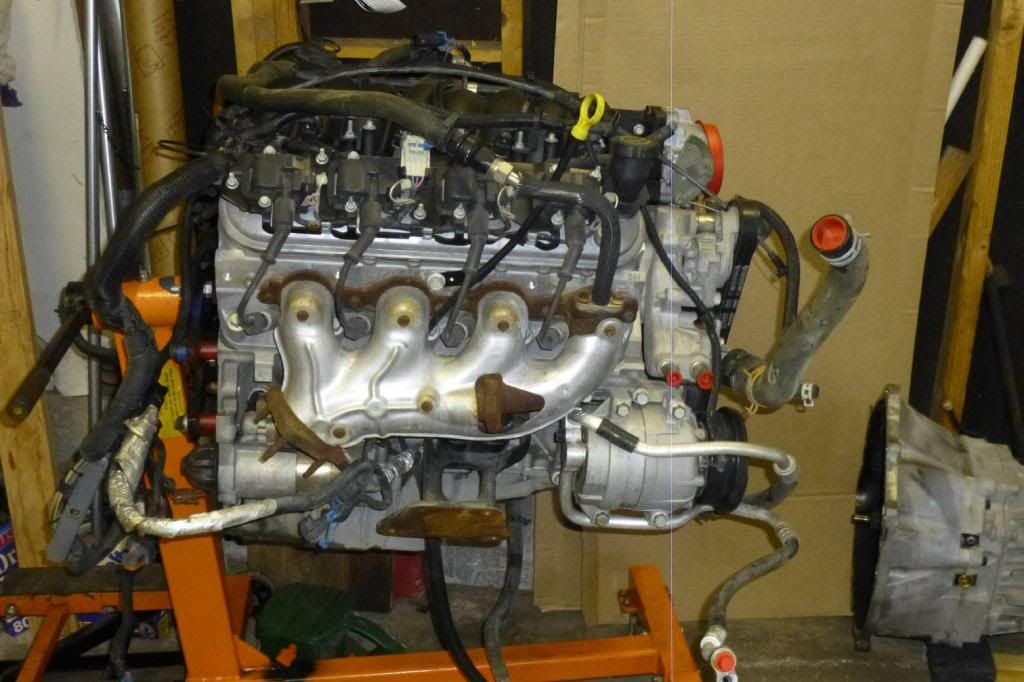
During the disassembly process, I took a boat load of pictures. That made it a lot easier to put things back together.
I left the short block pretty much alone. I didn't even remove the pistons or crank.
I did make a few upgrades, though. A Howards cam, that pretty much mimics the GM ASA cam. Good power, but gentle on the valve train. Upgraded beehive valve springs. New timing chain, with a stabilizer. New oil pump.
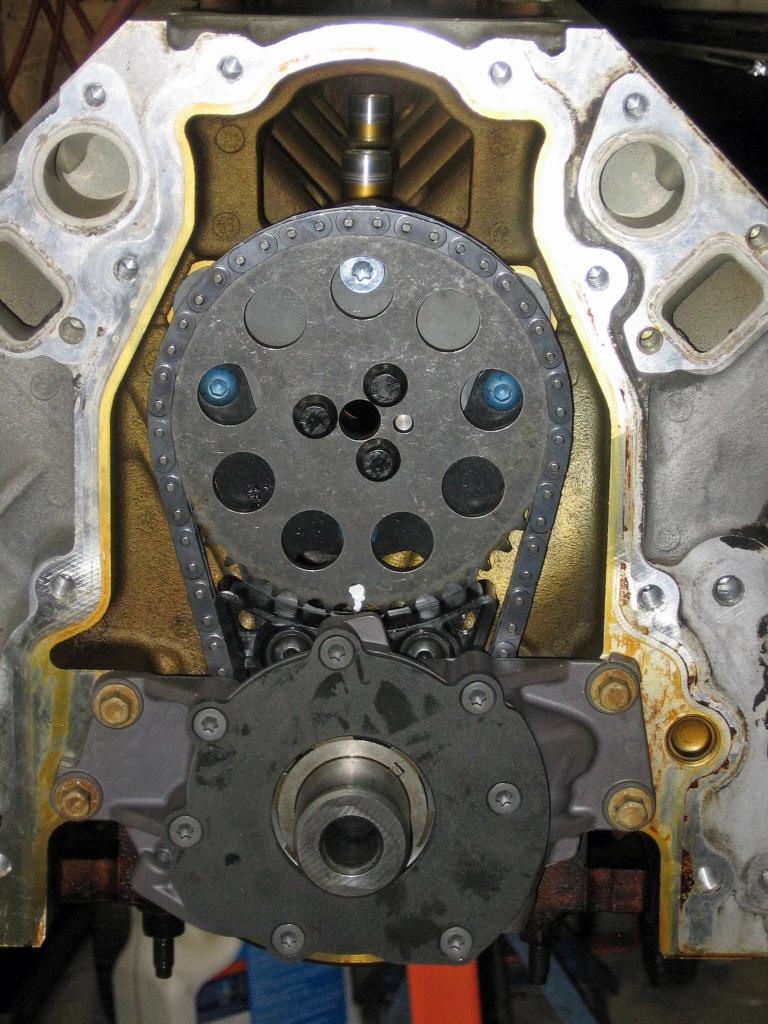
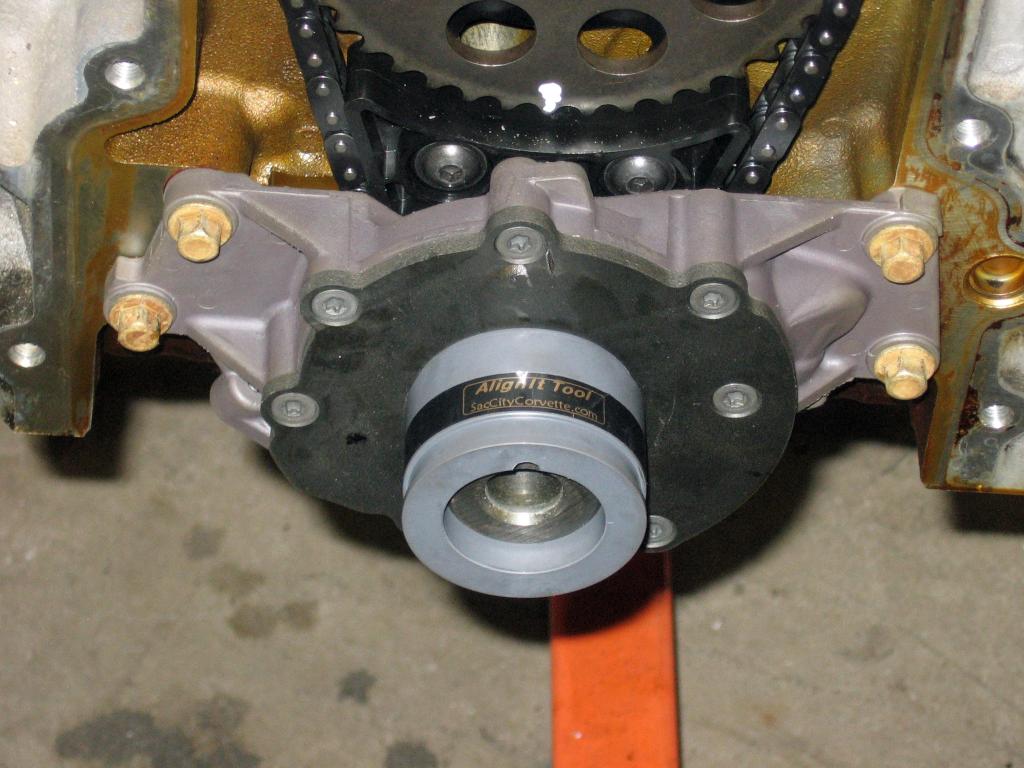
Installing the oil pump is a meticulous process. It must be centered just right. You can use feeler gauges. But I bought this tool to make it simple.
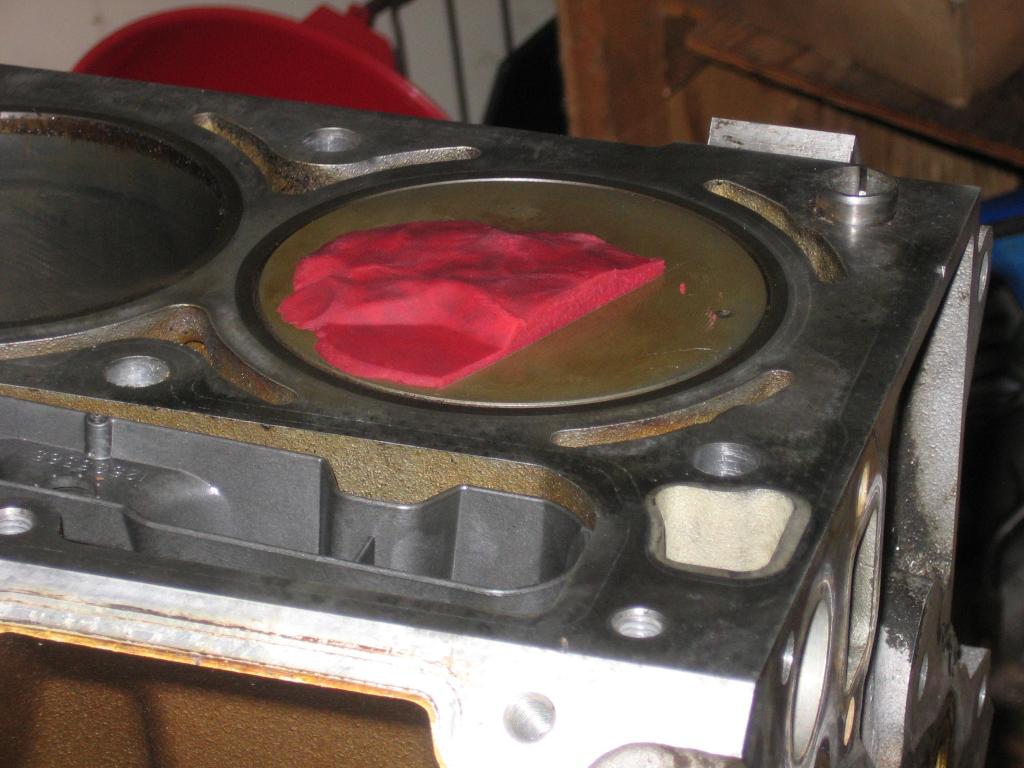
A new cam requires you to check piston to valve clearance. I do all 8 pistons. Probably not needed for an engine this mild. But it helps me sleep at night.
Getting to the back of the engine for a gasket change was not difficult at all.
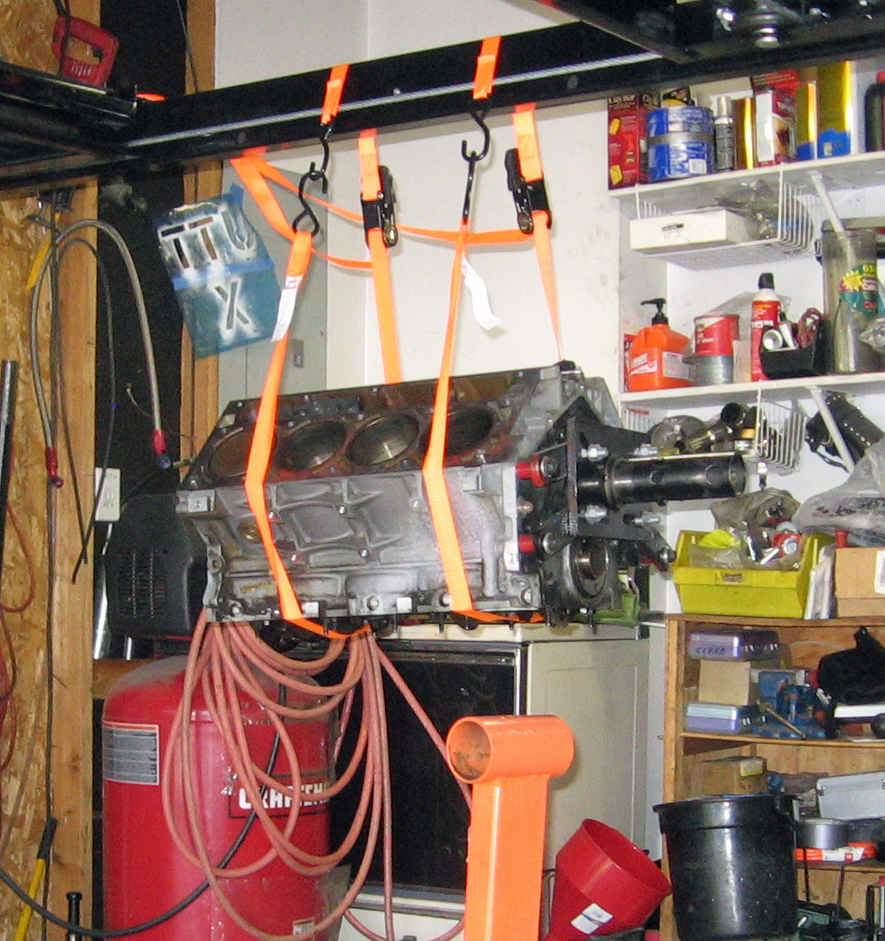
I chose an LS1 for a lot of reasons. They're readily available, and inexpensive. I had the whole palate delivered to my house for $4K.


During the disassembly process, I took a boat load of pictures. That made it a lot easier to put things back together.
I left the short block pretty much alone. I didn't even remove the pistons or crank.
I did make a few upgrades, though. A Howards cam, that pretty much mimics the GM ASA cam. Good power, but gentle on the valve train. Upgraded beehive valve springs. New timing chain, with a stabilizer. New oil pump.

Installing the oil pump is a meticulous process. It must be centered just right. You can use feeler gauges. But I bought this tool to make it simple.

A new cam requires you to check piston to valve clearance. I do all 8 pistons. Probably not needed for an engine this mild. But it helps me sleep at night.


Getting to the back of the engine for a gasket change was not difficult at all.

Last edited by .boB; 10-20-2014 at 05:26 PM.
#2
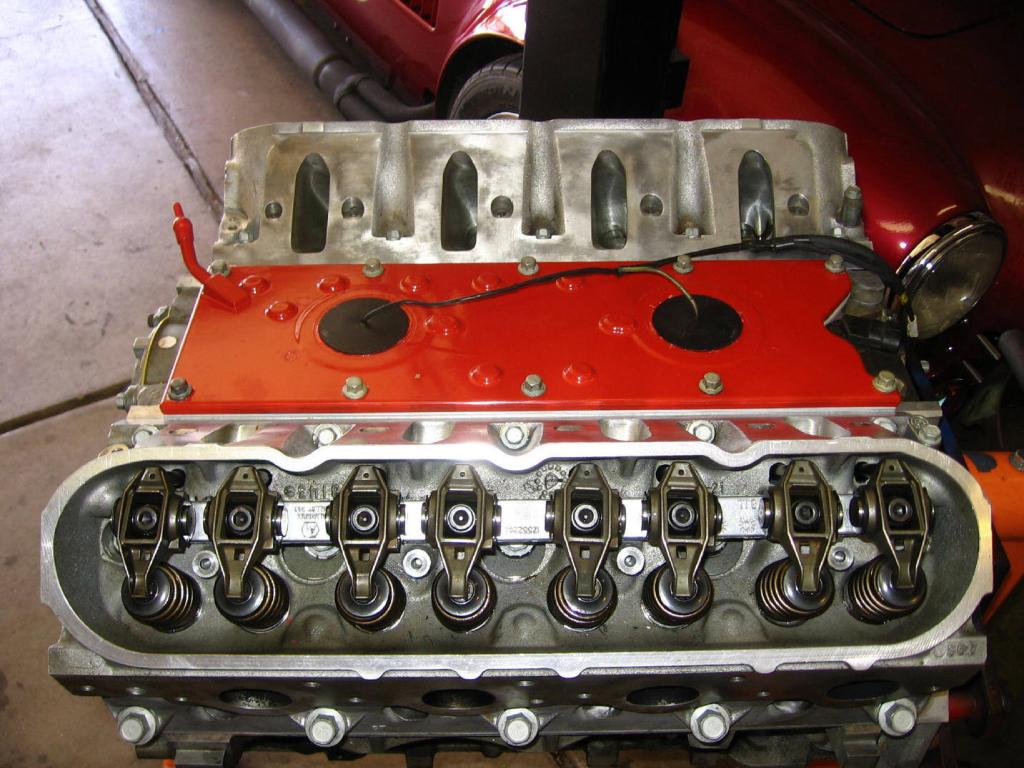
I upgraded to a better valley cover. This one has the PCV valve built in to the cover. I also kept the stock knock sensor. If they become problematic, I can always disconnect them later.
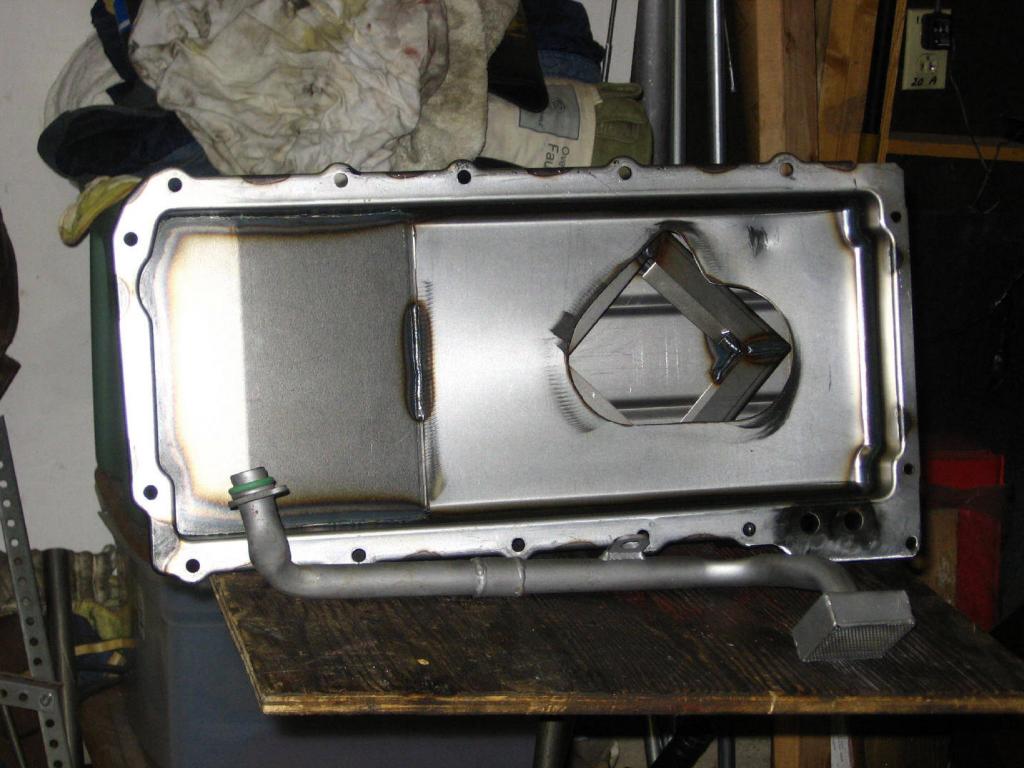
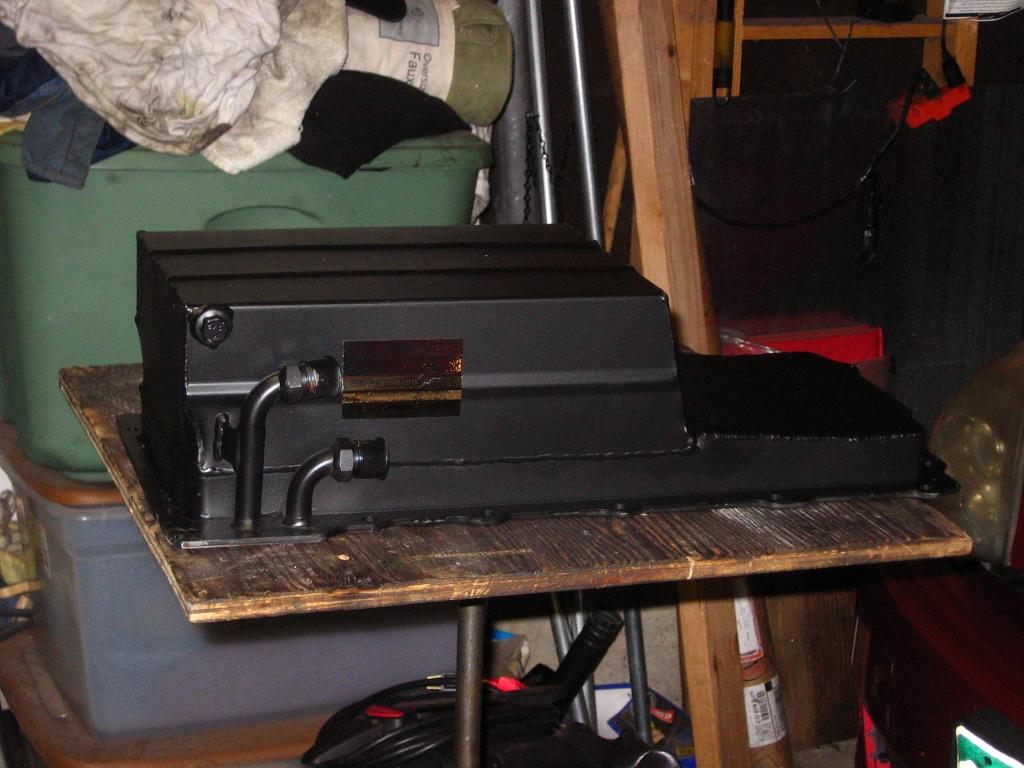
The oil pan is built by Kevco, as supplied by V8R. I originally ordered the more expensive aluminum pan. But they told me the steel pan has better oil control.
The heads are stock GM casting that have been worked over a little bit. Nothing radical, though. The deck was shaved for more compression, and the ports were enlarged a tad. Stock sized valves. And some PAC beehive valve springs. Oddly enough, I didn't take any pictures of the heads.

The oil pan is built by Kevco, as supplied by V8R. I originally ordered the more expensive aluminum pan. But they told me the steel pan has better oil control.


The heads are stock GM casting that have been worked over a little bit. Nothing radical, though. The deck was shaved for more compression, and the ports were enlarged a tad. Stock sized valves. And some PAC beehive valve springs. Oddly enough, I didn't take any pictures of the heads.
#3
For the top end, I wanted to use safety wire, because some of the bolts have a very low torque spec. Since the can't easily be seen, this seemed like a good idea. Some of the bolts were easy to drill. And others not so much.

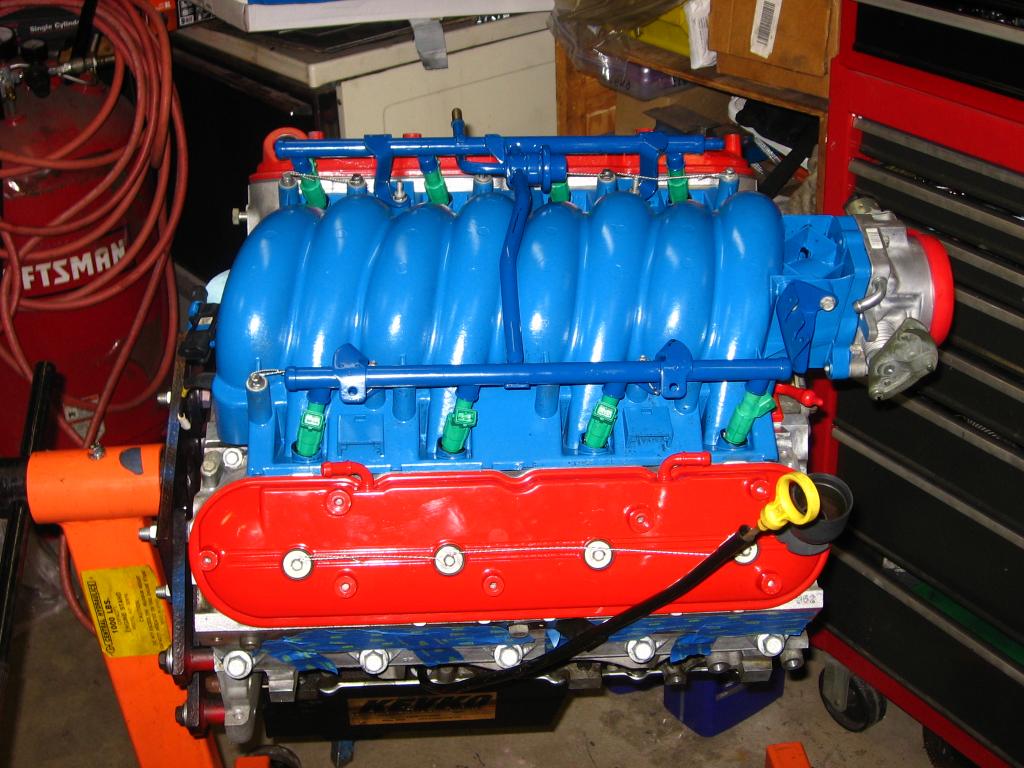

Finished and ready to install, except for a few small details.
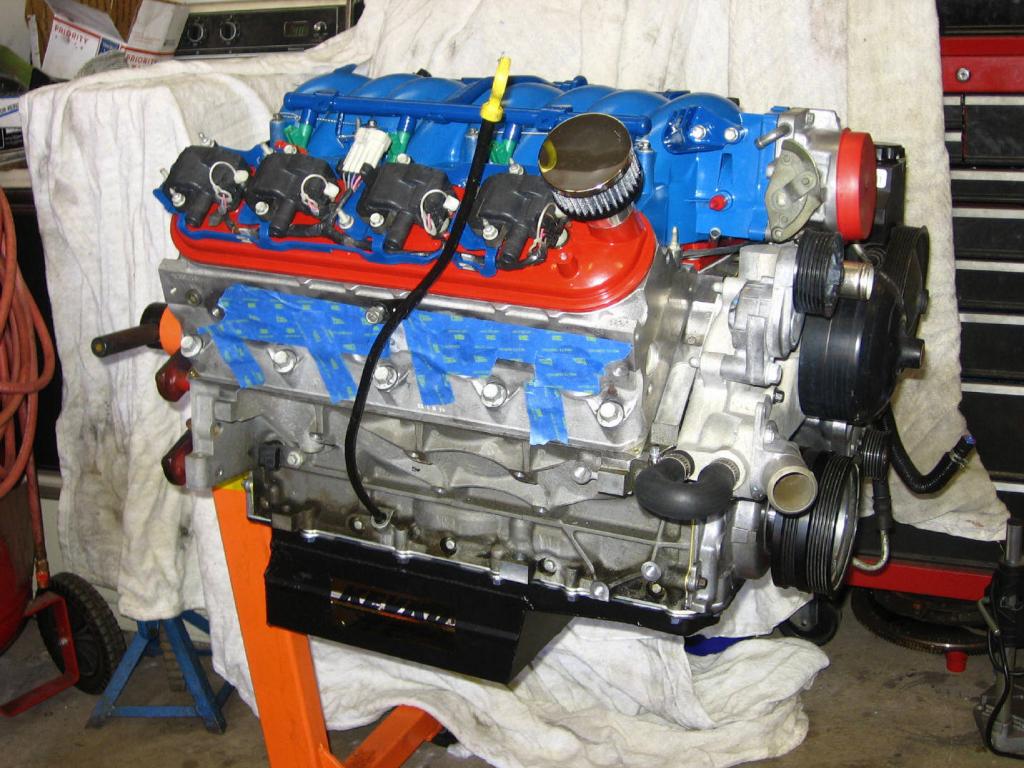
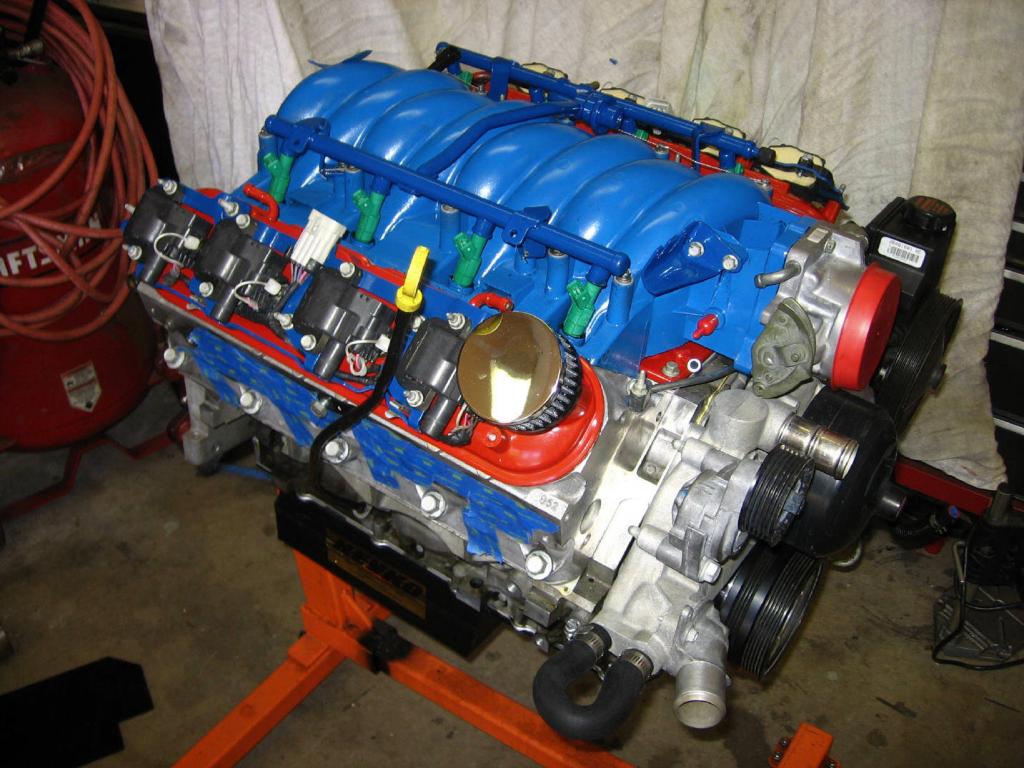


Finished and ready to install, except for a few small details.


Last edited by .boB; 10-20-2014 at 05:27 PM.
#4
Nice! I can't say I have ever seen anyone paint the intake or valve covers before. Dandy idea! I suppose it all shows in your car.
You are going to like that cam I think. I really do, but then again I just drive it to work... I heard the same about the oil pan plus the steel ones don't leak. 8 qt oil changes are not so much fun but not the end of the world.
So what is the engine out of and how many rounds on the donor?
You are going to like that cam I think. I really do, but then again I just drive it to work... I heard the same about the oil pan plus the steel ones don't leak. 8 qt oil changes are not so much fun but not the end of the world.
So what is the engine out of and how many rounds on the donor?
Last edited by charchri4; 10-21-2014 at 11:56 AM.
#5
The engine came out of a 2001 Trans Am, with 47K miles on it. It looked good and clean inside. Should be a solid motor for 2-3 seasons. I hope. 
My current track car takes 11 qts of oil. I use a true synthetic, at about $9.50 a qt. A small expense, considering.

My current track car takes 11 qts of oil. I use a true synthetic, at about $9.50 a qt. A small expense, considering.
#6
I'v not seen it done, either. They're either black plastic or plain alum. I had the time and materials, so I decided to spiff it up a bit. It is a race car, but doesn't need to be boring.
#7
I received the front sub frame last week from V8R. Nice piece, kinda heavy.

I did a test fit on the engine, and discovered a couple of small issues.
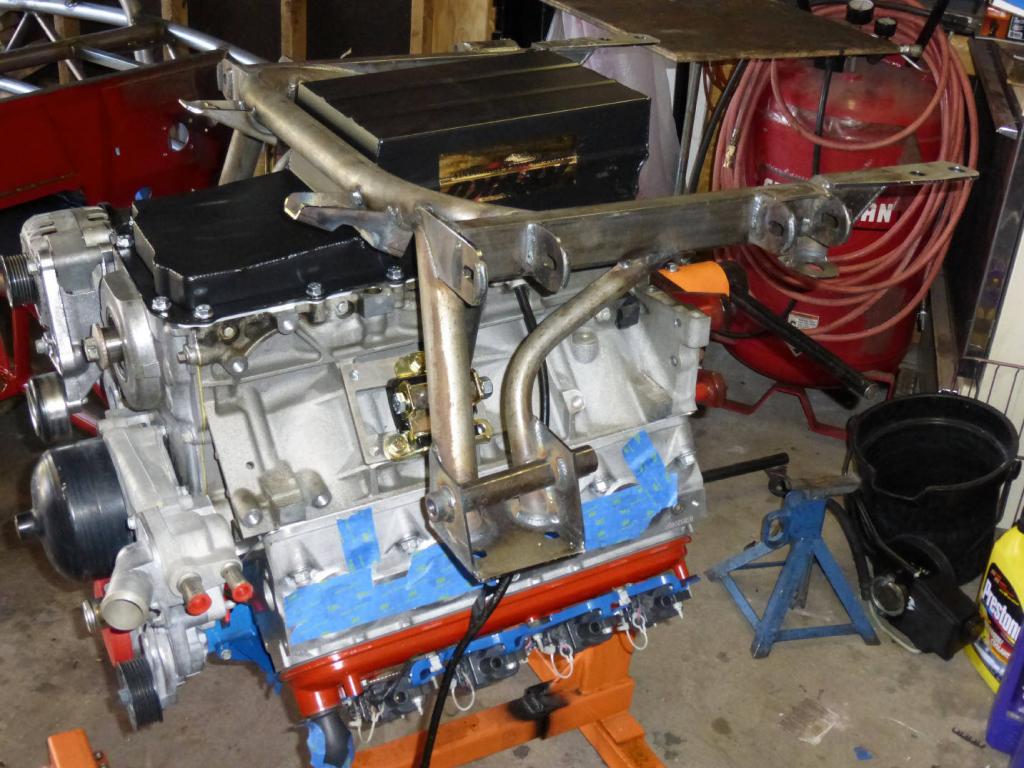
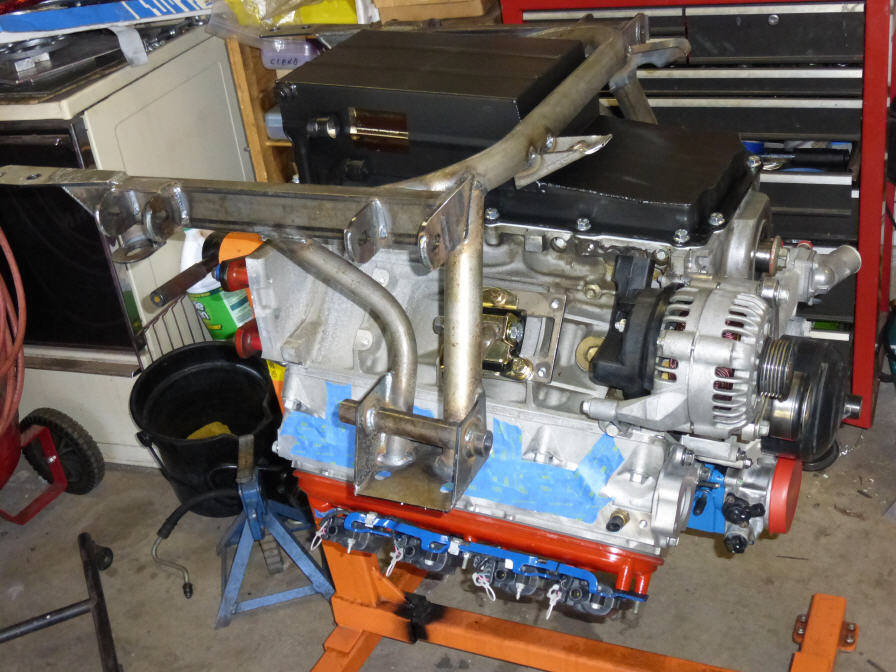
I'm not keen on spending $600 on a set of shorty headers. No real power gain over some good manifolds, and that's a lot of money. I have a set of Corvette headers that I wanted to use. They're a bit heavy, but make good power. Unfortunately, they don't even come close to fitting.
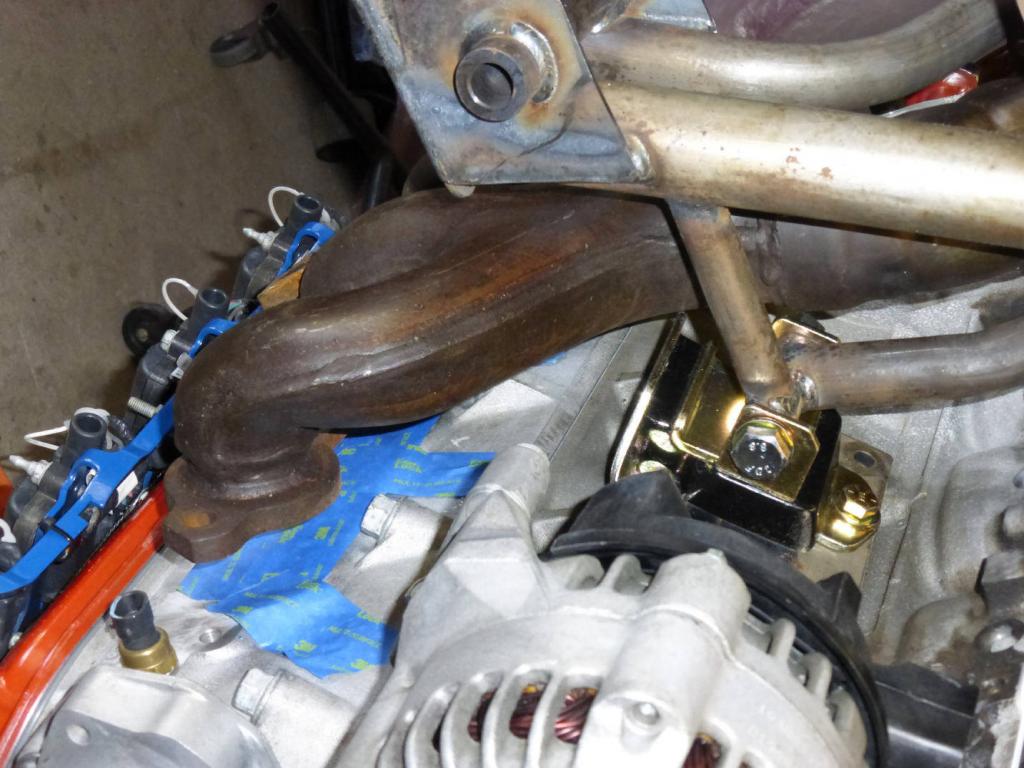
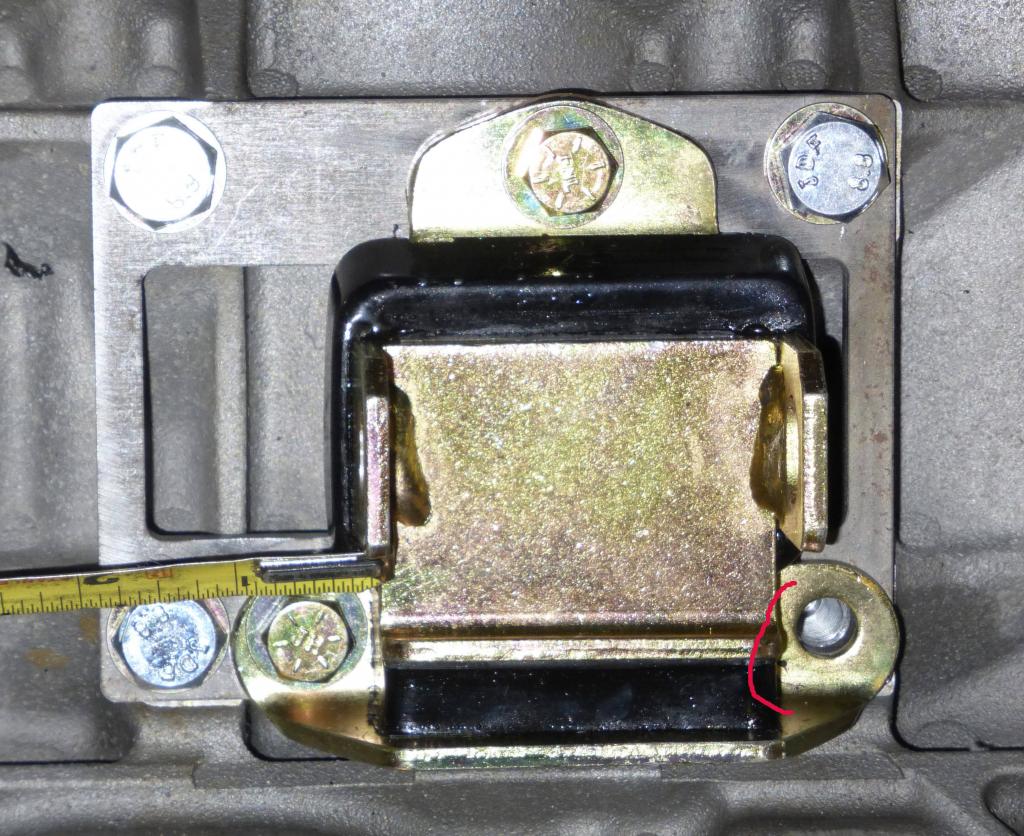
The motor mounts don't fit well. The plate gets bolted to the block, and then the poly motor mounts bolts to the plate. But, the plate bolt is bigger than the mount bolt. So when you try to bolt it on, it doesn't fit. A few moment with a die grinder in the area marked with red should fix that easily enough. A more elegant solution would be to use a flanged allen bolt. But I already own the die grinder.
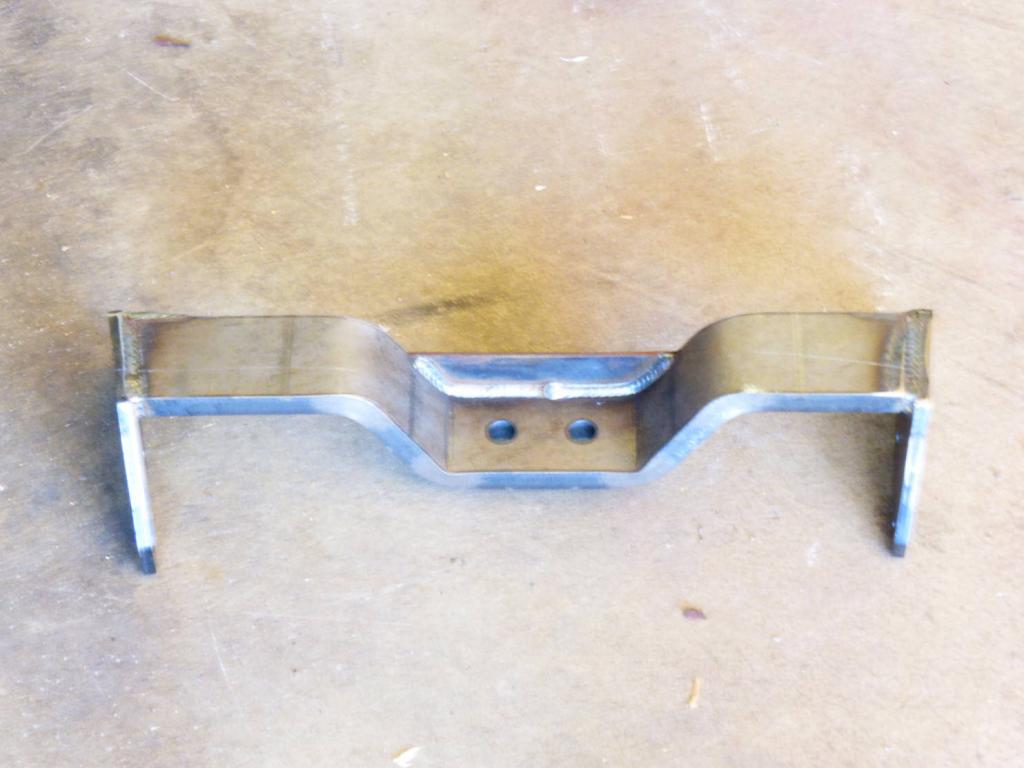
The transmission mount comes with it, specifically made for the Exocet. But, I have been told that the mounting rails on the chassis are not strong enough for the torque of the V8, and need to be braced. Of course, I discover this after the chassis is painted. No big deal. I'll strip off the paint, apply a weld through coating, add the braces, and repaint it.

I did a test fit on the engine, and discovered a couple of small issues.


I'm not keen on spending $600 on a set of shorty headers. No real power gain over some good manifolds, and that's a lot of money. I have a set of Corvette headers that I wanted to use. They're a bit heavy, but make good power. Unfortunately, they don't even come close to fitting.

The motor mounts don't fit well. The plate gets bolted to the block, and then the poly motor mounts bolts to the plate. But, the plate bolt is bigger than the mount bolt. So when you try to bolt it on, it doesn't fit. A few moment with a die grinder in the area marked with red should fix that easily enough. A more elegant solution would be to use a flanged allen bolt. But I already own the die grinder.


The transmission mount comes with it, specifically made for the Exocet. But, I have been told that the mounting rails on the chassis are not strong enough for the torque of the V8, and need to be braced. Of course, I discover this after the chassis is painted. No big deal. I'll strip off the paint, apply a weld through coating, add the braces, and repaint it.

Last edited by .boB; 10-21-2014 at 11:34 PM.
#9
Back to work. Still got a lot to do. Today was mostly working on the cooling system. I purchased a used 3 core double pass radiator, and had to fab some mounts to get it to fit.


I wanted to mount the radiator higher up in the chassis, for all the obvious reasons. But the sway bar got in the way.
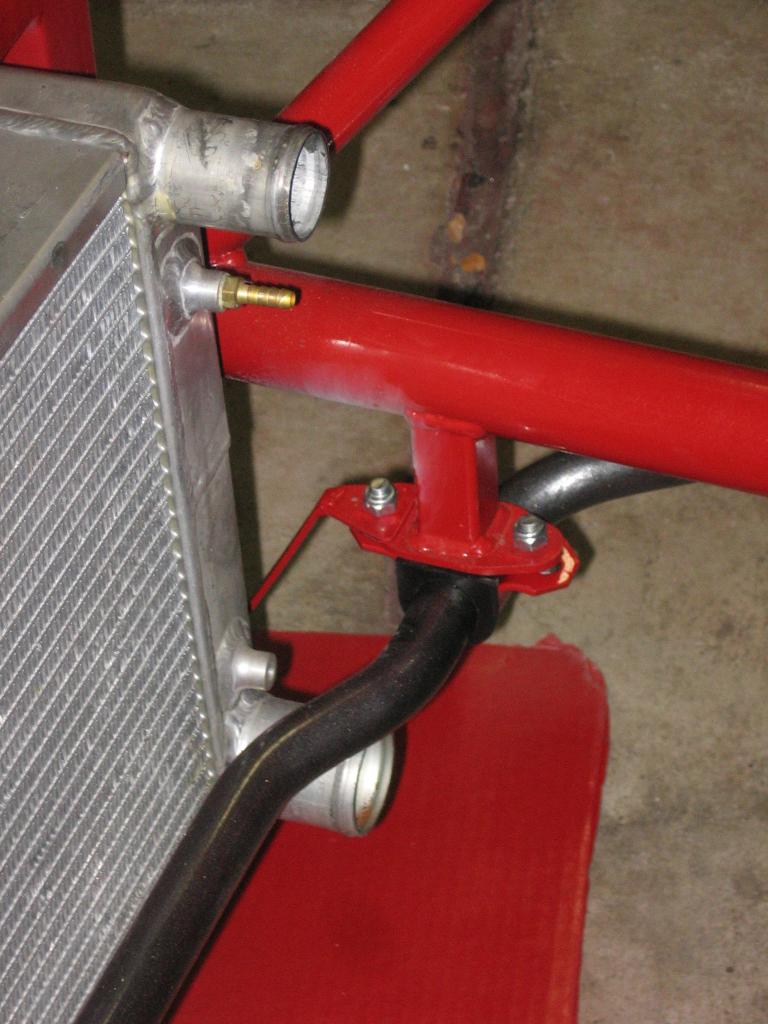
And, also because of the sway bar, my 12" fan won't fit. I'll probably use 2 6" fans instead.


I wanted to mount the radiator higher up in the chassis, for all the obvious reasons. But the sway bar got in the way.

And, also because of the sway bar, my 12" fan won't fit. I'll probably use 2 6" fans instead.

#10
Also spent a lot of time mounting the other cooling stuff. I mounted them both in the middle for a number of reasons. Balance, symmetry, hose routing, and to satisfy my OCD. 
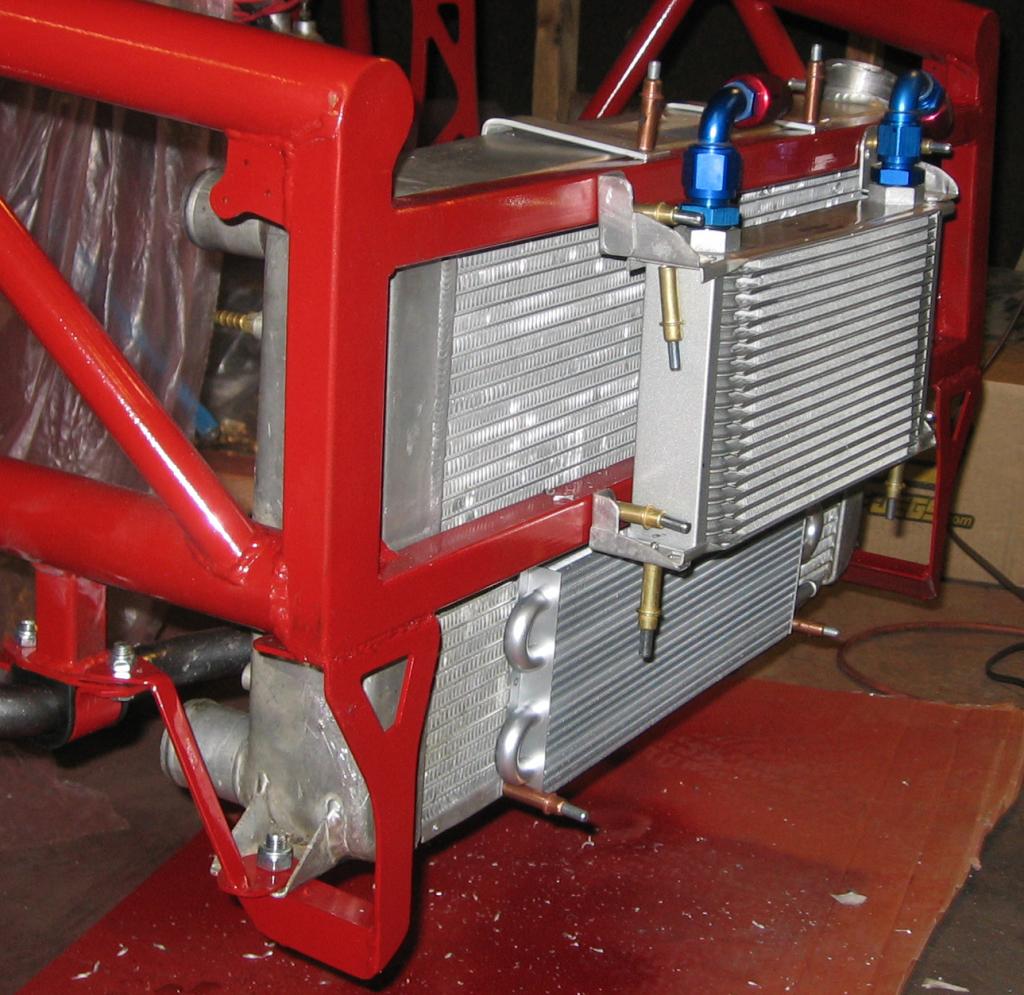

I made these simple brackets out of some alum sheet I had left over.
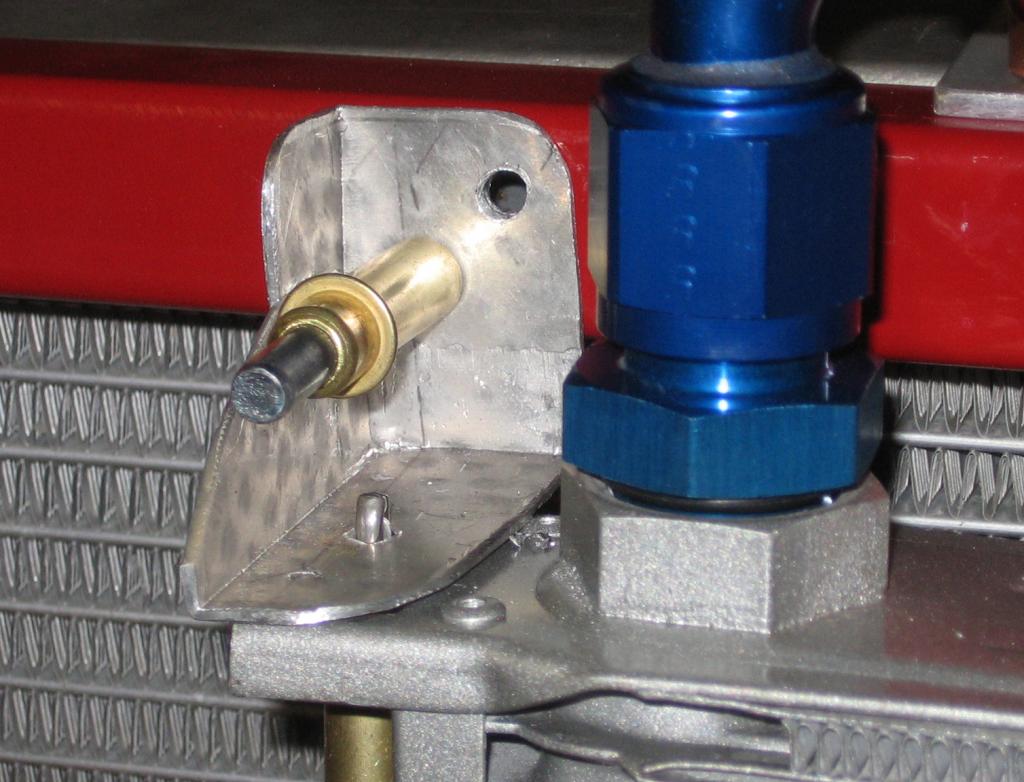
Before final installation I'll cover everything with a 1/8" SS mesh to protect it from track debris. I did that for the Cobra, and the radiator is still in perfect shape after all the years and miles. Not a single blade is bent.


I made these simple brackets out of some alum sheet I had left over.

Before final installation I'll cover everything with a 1/8" SS mesh to protect it from track debris. I did that for the Cobra, and the radiator is still in perfect shape after all the years and miles. Not a single blade is bent.
#11
.boB....you are giving me fits here! Now I am thinking I will need to paint m LS & trans to match the rest of the car....or should I go contrasting color....another sleepless night thank you!
#12
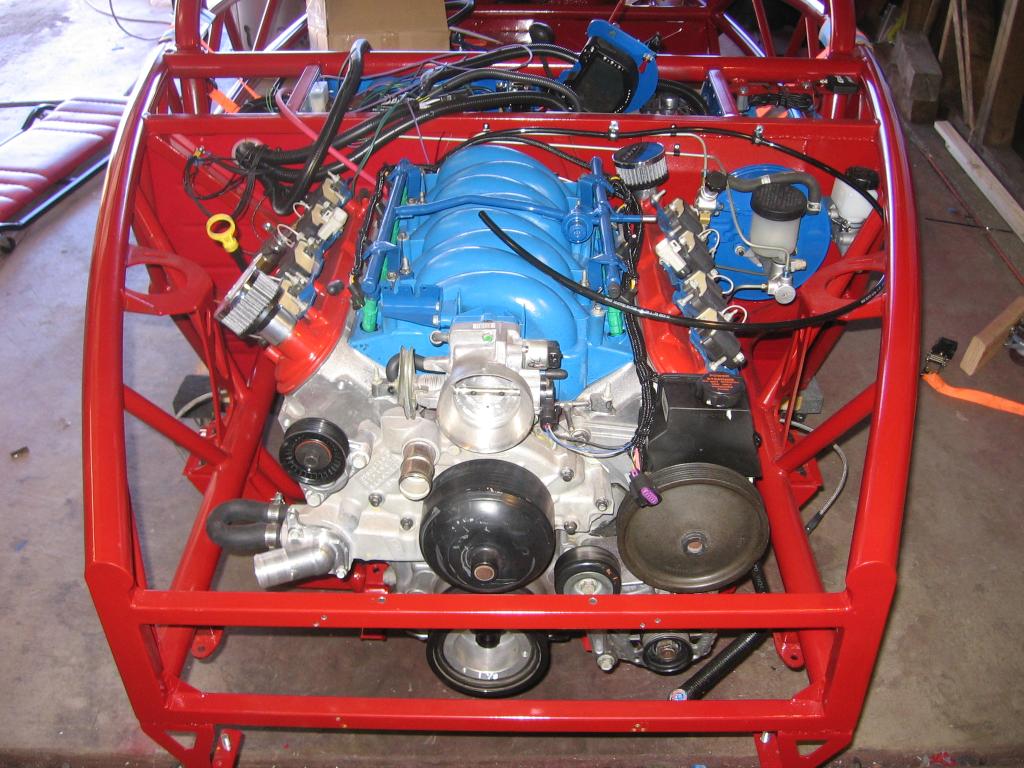
I have this thing against unpainted/bare metal parts on cars. Kind of irrational, really. But I don't like rust - even surface/flash rust bugs me. So I coat pretty much everything. Most of the parts are painted red, because I have that from painting the frame.
But I also used 2 different shades of Ford Blue, because I have a couple of cans of that lying around from previous projects. Although I think I like the light blue, AKA Old Ford Blue.
But I also used 2 different shades of Ford Blue, because I have a couple of cans of that lying around from previous projects. Although I think I like the light blue, AKA Old Ford Blue.
#13
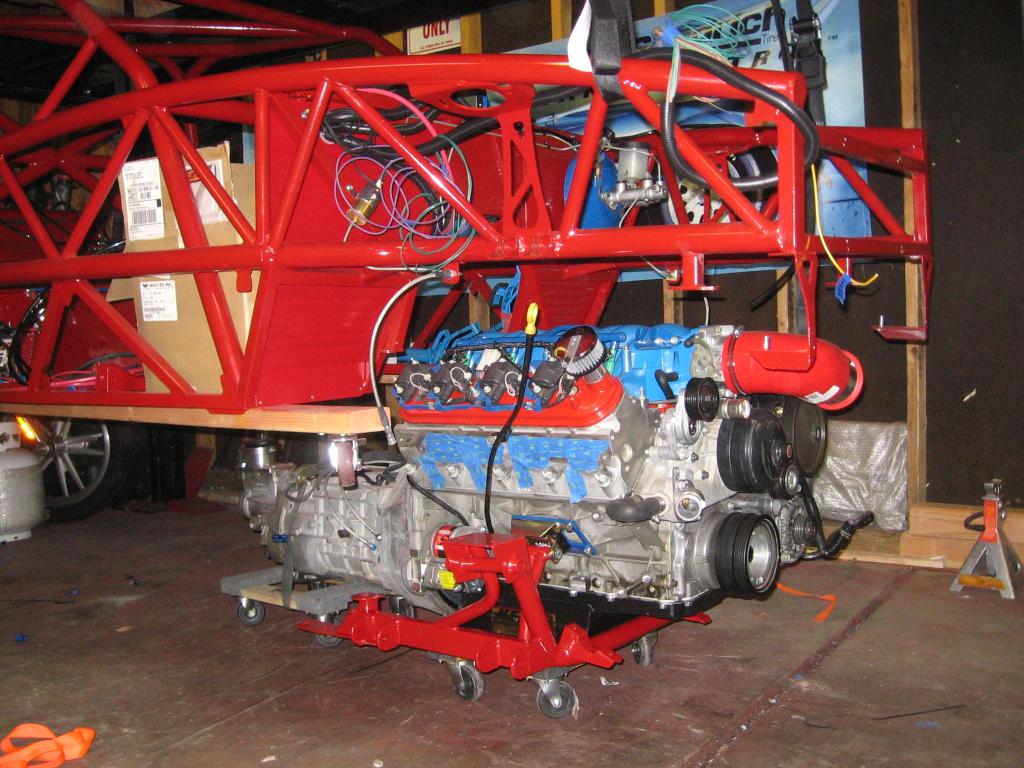
I set the engine in place last week end. Kind of a tight fit, and took most of the day to get it in.
The engine and trans have to go in as a unit. Once in that tiny chassis, there's not enough room get the bellhousing bolts in. Then, they have to go in from the bottom. Just like an F-Body. At that point, it's pretty easy to attach the lower cradle to the engine.
I put the engine/trans on a furniture mover from HF. Low to the ground and easy to manouver. For the chassis, I put a couple of 4x4's across my lift pads, and attached the chassis to them with cargo straps. Easy to move the chassis up and down with press of a button.
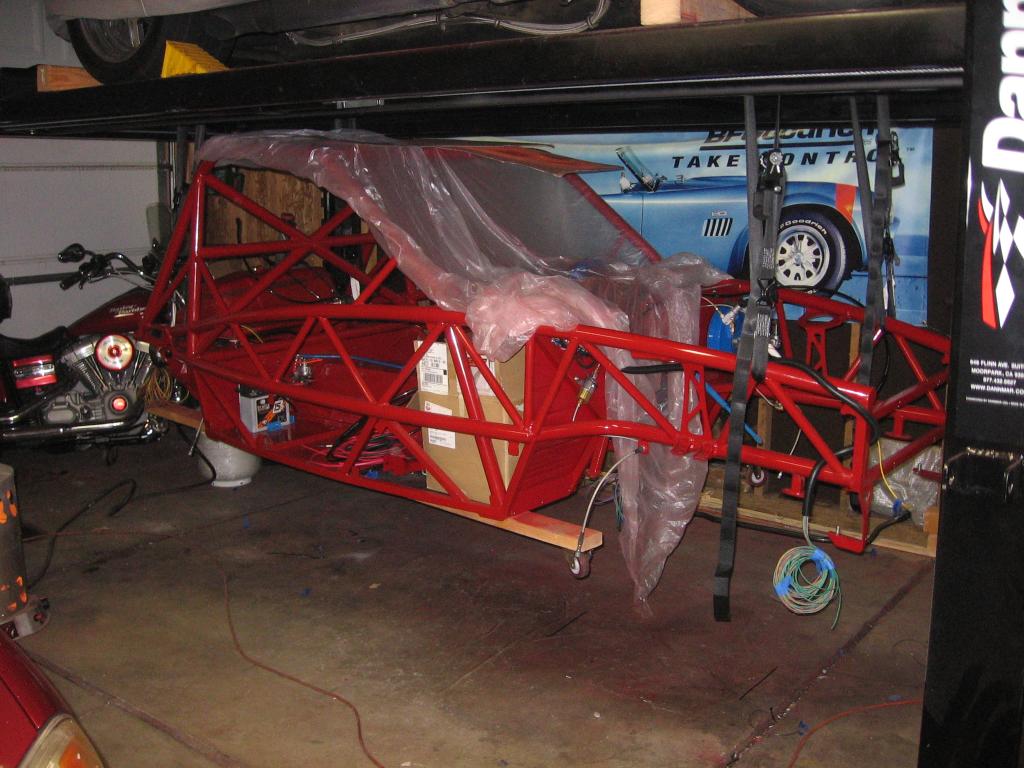
It didn't quite fit. There was some interference from this frame tube. I had to cut out a small portion, and then weld in some supporting steel.
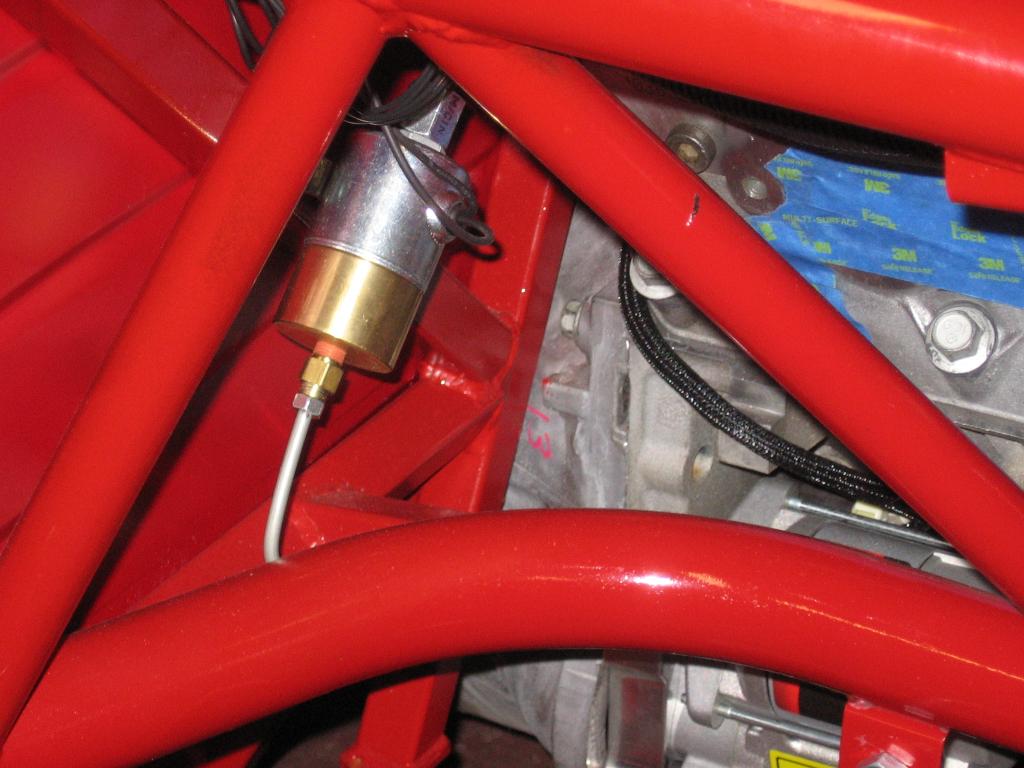
Pretty tight fit. Gotto do something about that water pump.
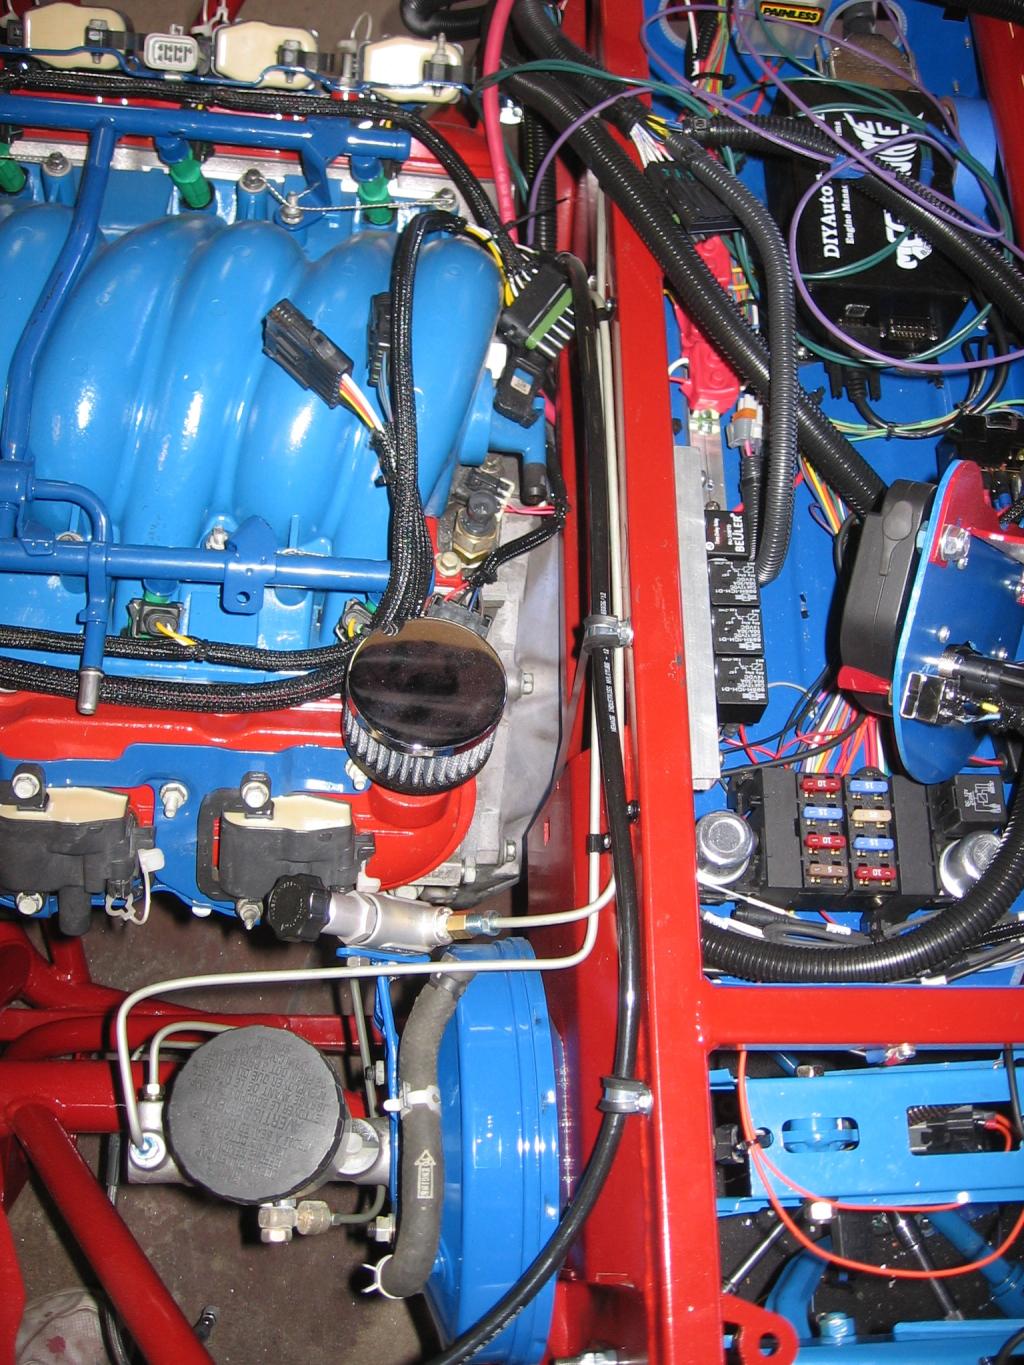
The engine and trans have to go in as a unit. Once in that tiny chassis, there's not enough room get the bellhousing bolts in. Then, they have to go in from the bottom. Just like an F-Body. At that point, it's pretty easy to attach the lower cradle to the engine.
I put the engine/trans on a furniture mover from HF. Low to the ground and easy to manouver. For the chassis, I put a couple of 4x4's across my lift pads, and attached the chassis to them with cargo straps. Easy to move the chassis up and down with press of a button.


It didn't quite fit. There was some interference from this frame tube. I had to cut out a small portion, and then weld in some supporting steel.

Pretty tight fit. Gotto do something about that water pump.


#16
"Iron Man" was given to me by the other NASA instructors, because I'm the last guy on the track at the end of the day. Unless the car breaks - and sometimes even when it does - I'm getting every last minute of track time I can get. I have even been out on the track all by myself - and it was glorious! 

Thread
Thread Starter
Forum
Replies
Last Post
Meierznutz
Other V8, V6, 4 cyl build threads including Exocet, Catfish, Westfield, Ratrod, etc
209
11-09-2020 10:05 AM
.boB
Other V8, V6, 4 cyl build threads including Exocet, Catfish, Westfield, Ratrod, etc
5
02-28-2016 10:14 AM
Currently Active Users Viewing This Thread: 1 (0 members and 1 guests)


