V8R sloooww build - 94 Miata - North Carolina
#201
Thx - Glad you like the build thread. NA dash bezel is from KG Works. They create some beautiful bits and pieces & you can find some of their offerings at places like R-Speed in Atlanta. RSpeed: KG Works Independent Look Cluster Miata
Or, look around here: ���i�ē��i�����Ԋ֘A�|���[�h�X�^�[�j
Or, look around here: ���i�ē��i�����Ԋ֘A�|���[�h�X�^�[�j
#202
Slow last few weeks on the Roadster project. I now have approx. 440 miles on the clock and haven't experienced too many or too severe setbacks on these early shake-down miles. But, it's worth bringing us up-to-date:
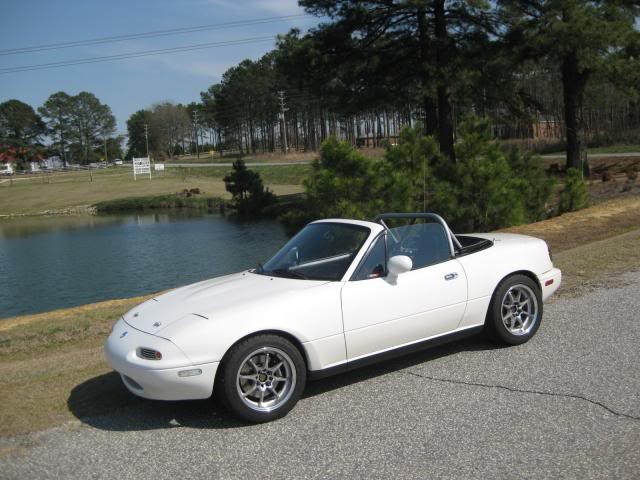
So somewhere around the 250 reading on the odometer, I was about 10 miles out of town on a gorgeous late Thursday afternoon when the engine just cut off at 55 mph climbing a slight hill on a straight 2-lane rural road. I was able to coast towards and turn into a residential street off the somewhat busy and narrow state highway - thank goodness. Speedhut fuel gauge showed 5/8 of a tank which I knew was wrong since I had yet to calibrate it to my Mazda tank sender, but didn't think it was out. I thought it was a fuel pump issue. Here's what a dead V8Miata looks like prior to rollback rescue:
Brought it in the shop, couldn't hear the pump turn on, even had difficulty getting my multimeter probes to "stick" in the factory fuel pump connector to check voltage. Decided to carry 2 gallon can for some fresh fuel and see if that did anything... Well, it did! It fired right up. So she then got a 10 gallon purchase to complement the full 2 gallons I put in it for a total of 12 gallons in a clean & empty 12 gallon tank... I'd say it was empty. And, fuel gauge is now calibrated with the proper resistance settings - thank you SpeedHut for making that super easy.
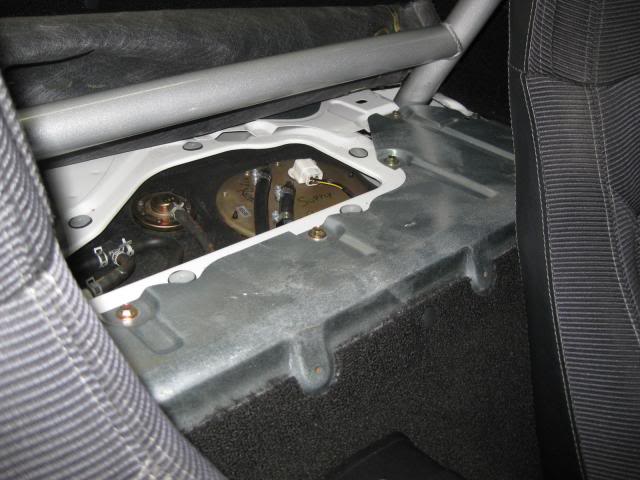
With about 350 miles on the clock, I decided to recheck clamps, wiring, bolts, etc for anything loose or problem-causing concerns. Did secure the rubber, fuel return line from regulator to tank as it wanted to rub on the sharp edge of the fuel tank assy. Found 1 loose lower shock bolt and one 10mm somewhat loose bolt on the LS2 block-off plate above the oil filter. A tell-tale sign of dampness from oil led me to that one, thankfully.
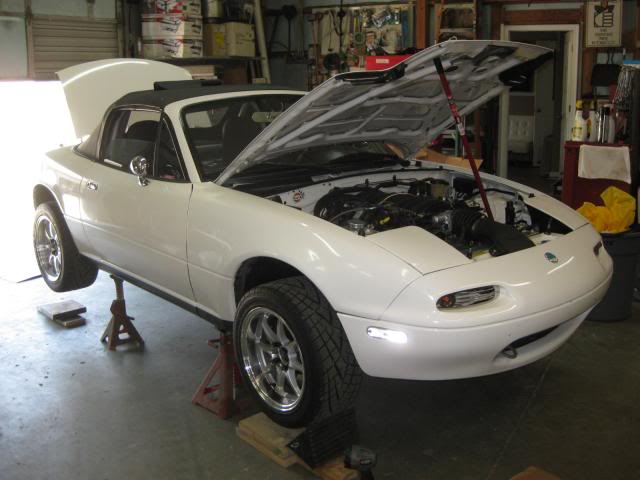
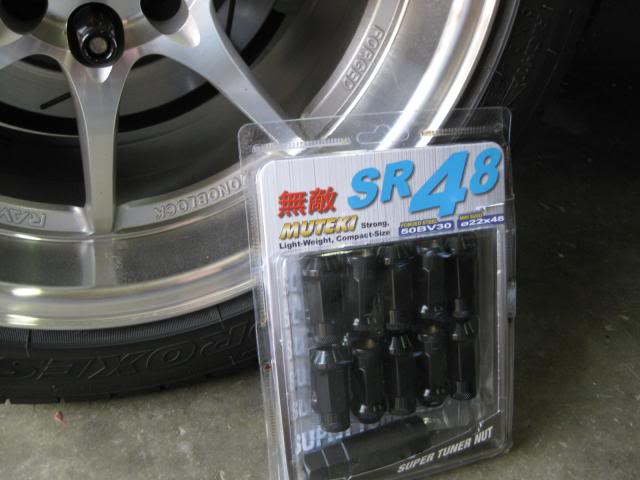
Went ahead and swapped out crazy lightweight aluminum open lug nuts I purchased last year with same thing but in steel from Muteki. I read where some folks had stripped the aluminum ones out... Don't want that.
Swapped out huge '94 power mirrors for these Autoblaze (Roadster sport-type mirrors) ones from Japan. Will keep factory mirrors wrapped up and on-hand for future installation if needed - because these little chrome mirrors LOOK great - but you cannot see $hit out of their curved glass. "What's behind me is not important," or so it was said in Gumball Rally movie.
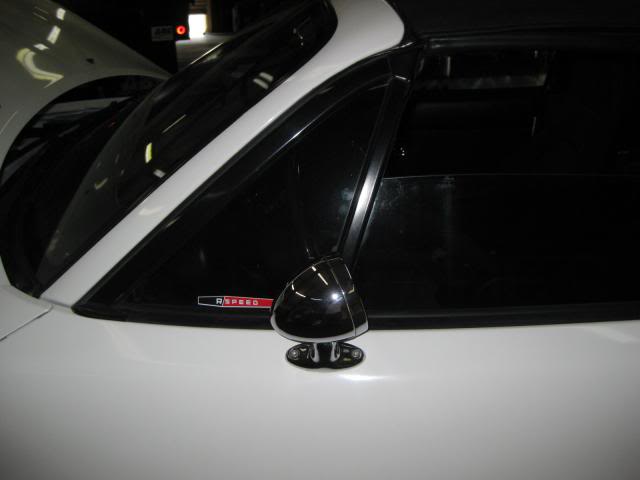
And, as this project car gets ready for The Mitty in a few weeks, I tossed on the hardtop for the complete look I'm going after. After the pollen begins to slow down, it can stand another wash as well...
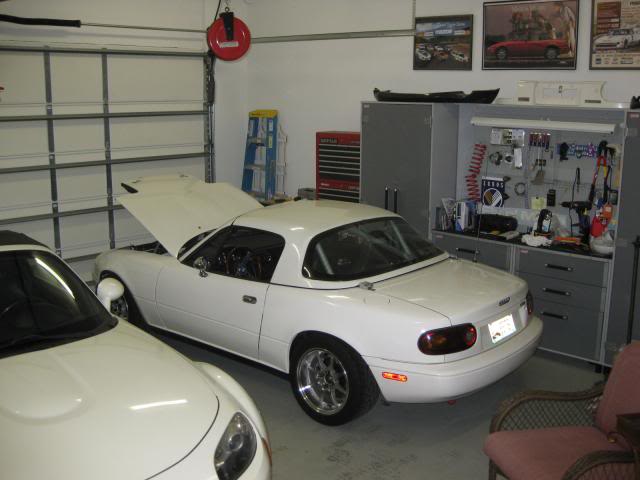
Right now, the only 2 small concerns I have with 440 miles are a small weep at the Ford diff - RH axle stub and OBD code P0833 that popped on during yesterday's 60 mile run. "Clutch Position Switch" not showing up -- probably because there is no such switch on my Mazda! Hopefully can get that cleared out of the computer next week...
So somewhere around the 250 reading on the odometer, I was about 10 miles out of town on a gorgeous late Thursday afternoon when the engine just cut off at 55 mph climbing a slight hill on a straight 2-lane rural road. I was able to coast towards and turn into a residential street off the somewhat busy and narrow state highway - thank goodness. Speedhut fuel gauge showed 5/8 of a tank which I knew was wrong since I had yet to calibrate it to my Mazda tank sender, but didn't think it was out. I thought it was a fuel pump issue. Here's what a dead V8Miata looks like prior to rollback rescue:

Brought it in the shop, couldn't hear the pump turn on, even had difficulty getting my multimeter probes to "stick" in the factory fuel pump connector to check voltage. Decided to carry 2 gallon can for some fresh fuel and see if that did anything... Well, it did! It fired right up. So she then got a 10 gallon purchase to complement the full 2 gallons I put in it for a total of 12 gallons in a clean & empty 12 gallon tank... I'd say it was empty. And, fuel gauge is now calibrated with the proper resistance settings - thank you SpeedHut for making that super easy.

With about 350 miles on the clock, I decided to recheck clamps, wiring, bolts, etc for anything loose or problem-causing concerns. Did secure the rubber, fuel return line from regulator to tank as it wanted to rub on the sharp edge of the fuel tank assy. Found 1 loose lower shock bolt and one 10mm somewhat loose bolt on the LS2 block-off plate above the oil filter. A tell-tale sign of dampness from oil led me to that one, thankfully.

Went ahead and swapped out crazy lightweight aluminum open lug nuts I purchased last year with same thing but in steel from Muteki. I read where some folks had stripped the aluminum ones out... Don't want that.


Swapped out huge '94 power mirrors for these Autoblaze (Roadster sport-type mirrors) ones from Japan. Will keep factory mirrors wrapped up and on-hand for future installation if needed - because these little chrome mirrors LOOK great - but you cannot see $hit out of their curved glass. "What's behind me is not important," or so it was said in Gumball Rally movie.

And, as this project car gets ready for The Mitty in a few weeks, I tossed on the hardtop for the complete look I'm going after. After the pollen begins to slow down, it can stand another wash as well...

Right now, the only 2 small concerns I have with 440 miles are a small weep at the Ford diff - RH axle stub and OBD code P0833 that popped on during yesterday's 60 mile run. "Clutch Position Switch" not showing up -- probably because there is no such switch on my Mazda! Hopefully can get that cleared out of the computer next week...
Last edited by ToySnakePMC; 04-14-2014 at 09:16 PM.
#203
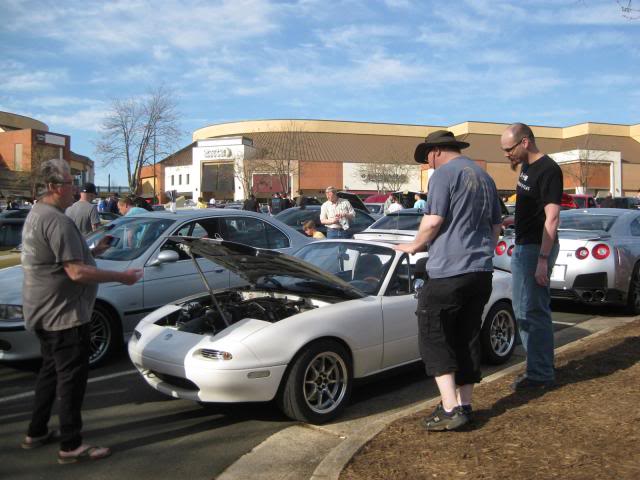
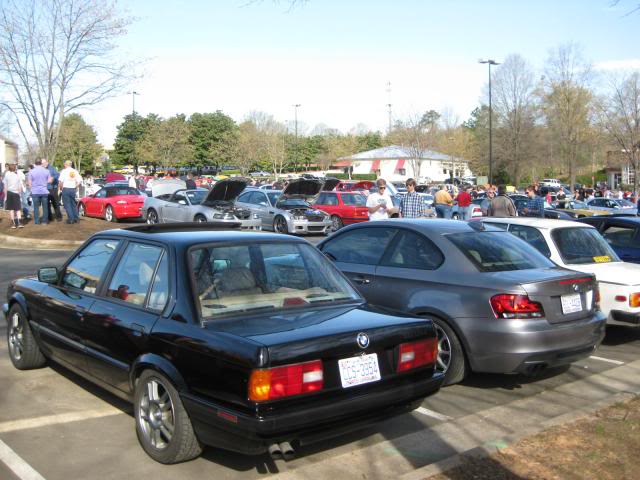
As far as events & happenings, I did bring the project car out to Raleigh's Cars & Coffee event on the first Saturday of April in Cary. I was surrounded by some high-end HP where I was parked... Lots of BMW's, Porsches, Vettes, and this silver 2-door Nissan Altima behind me. (Okay, it's not an Altima coupe - that's obviously a great-looking GT-R!!!) Actually, I had a good crowd of folk check out the Mazda all morning long - some people came back twice with either their friends to show or brought their iPad to film it sitting there. Most cannot believe how well the LS fits in these early cars...
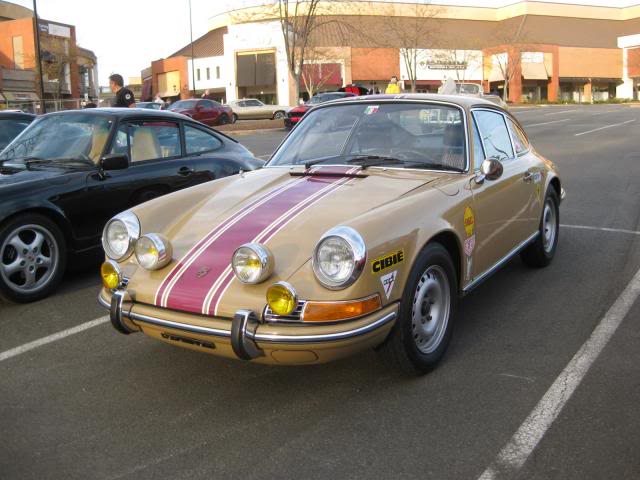
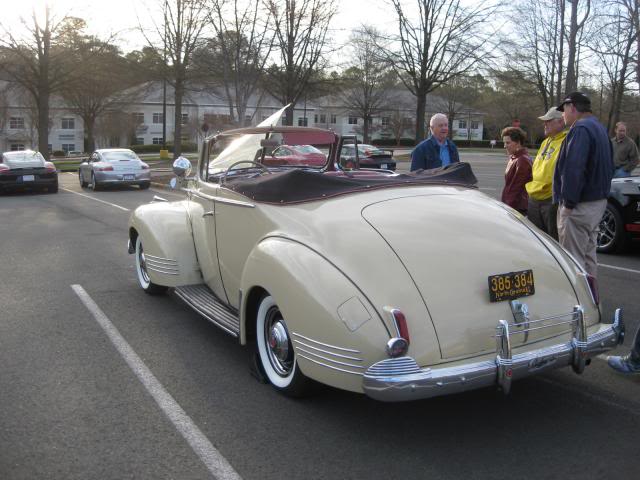
Some early morning favorites were the rally-inspired 911 and this '41 Packard in beige paint and red leather - nice driver, for sure.
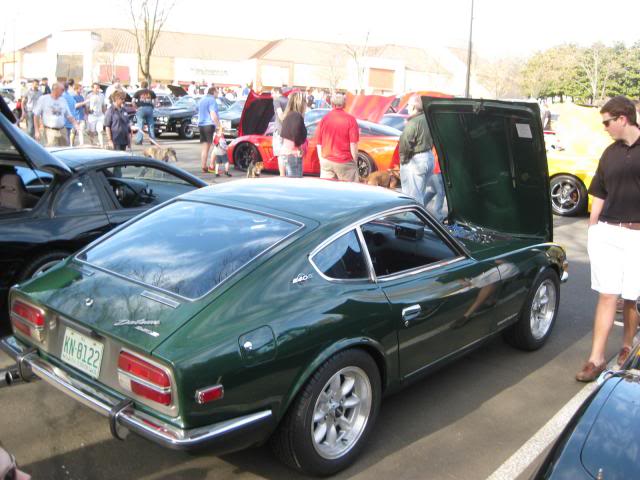
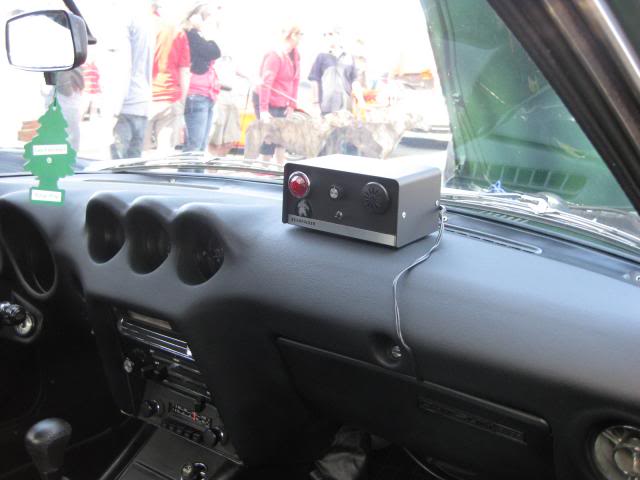
How can you not like an early '71 Z - period correct down to the working "Fuzzbuster" which the owner says it does a great job at finding automatic sliding doors at gas stations and offices!
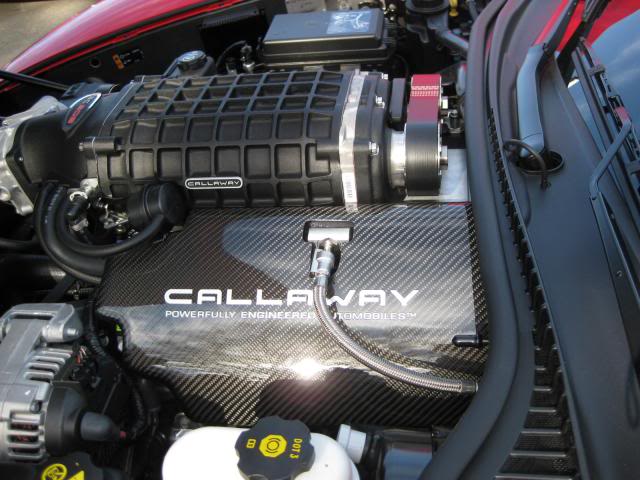
C6 Callaway Corvette was impressive as were many other high-end cars on hand. McLaren super car, Fisker, new 911's, you name it were there. Guesstimate of about 300+/- cool cars to look at. This powerplant would be a great addition to my little car:
Love E30 2 and four door BMW's... The 1 Series dressed in grey is pretty darn cool as well - Can't remember if this is the Series 1 M or not that was there... it just costs a ton more than a well-used E30!
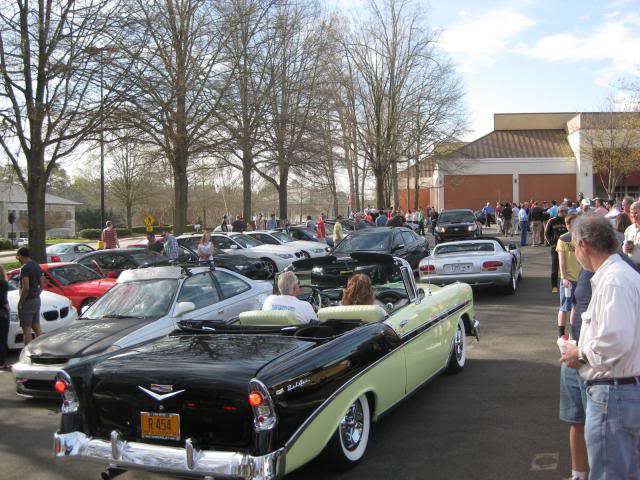
And finally, this '56 Chevy looks great coming and going. Great people and a lot of fun!

Some early morning favorites were the rally-inspired 911 and this '41 Packard in beige paint and red leather - nice driver, for sure.


How can you not like an early '71 Z - period correct down to the working "Fuzzbuster" which the owner says it does a great job at finding automatic sliding doors at gas stations and offices!


C6 Callaway Corvette was impressive as were many other high-end cars on hand. McLaren super car, Fisker, new 911's, you name it were there. Guesstimate of about 300+/- cool cars to look at. This powerplant would be a great addition to my little car:

Love E30 2 and four door BMW's... The 1 Series dressed in grey is pretty darn cool as well - Can't remember if this is the Series 1 M or not that was there... it just costs a ton more than a well-used E30!

And finally, this '56 Chevy looks great coming and going. Great people and a lot of fun!

Last edited by ToySnakePMC; 04-14-2014 at 02:00 PM.
#206
#207
We'll get there Thurs nite and be at Road Atlanta Friday and Saturday, for sure. Keith with FM said they're bringing 4 cars - I would guess that would include 1 or 2 V8's... Such a fun event, cannot wait.
#208
A few last minute checks and small additions to the project Mazda before we head out tomorrow AM to The Mitty at Road Atlanta... where I'll definitely take as many pics as I can remember to do so of any worthwhile Mazda or V8Miata content.
I had almost forgot purchasing this exhaust wrap after reading RevLimiter's blog last Fall about this same product. I, like several other LS Miata cars I've read about, am concerned about heat and pressure build-up in the fuel tank so I installed this thing in about 10-15 minutes...
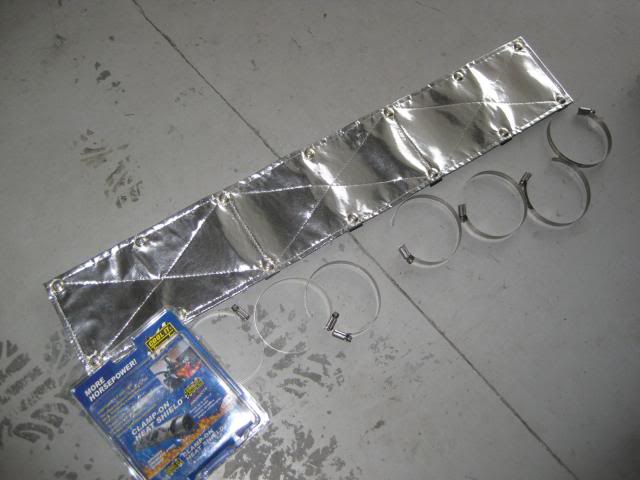
This particular one is 3 feet in length, is made of some heavy-duty, quilted material and with the integral brackets and st/st clamps, it stands off the exhaust pipe by approx. 1/4"-3/8" or so.
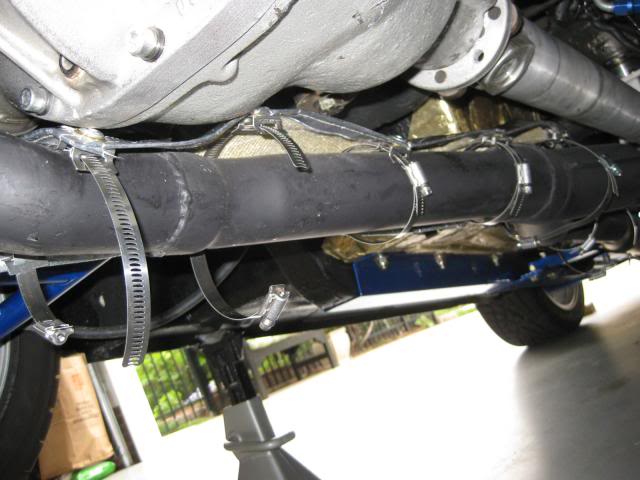
I slid it as far back as I could - which is just somewhat beside the Ford diff so it shields the above tank as best as possible. The front edge reaches probably to somewhere around the rear of the driver seat.
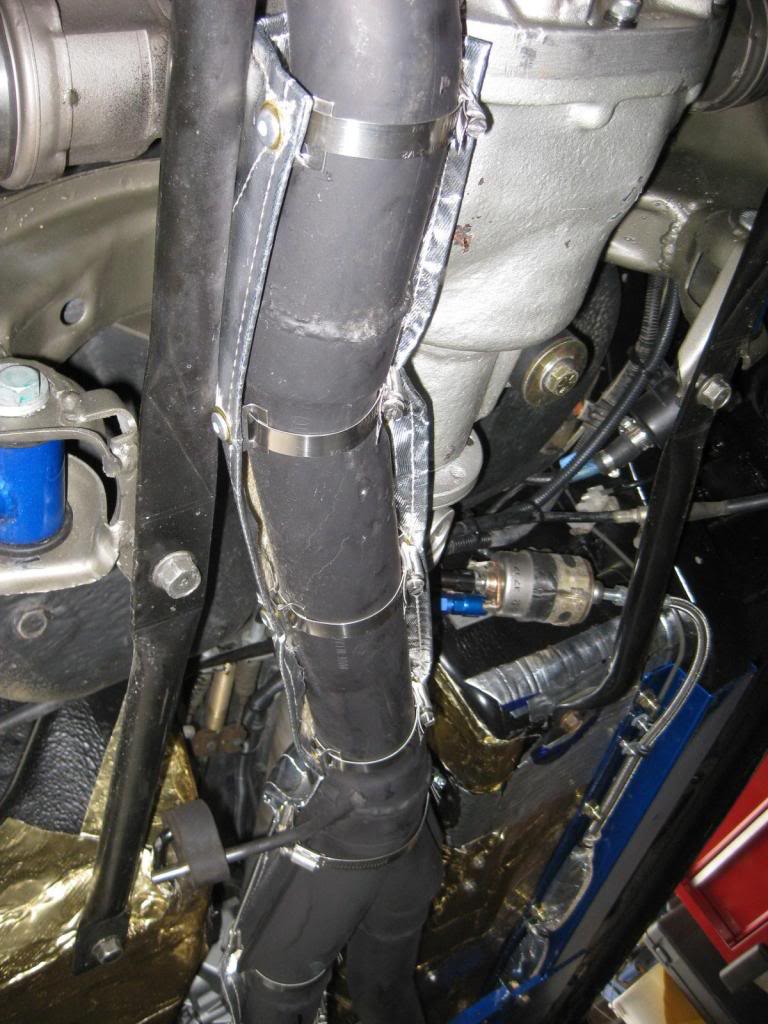
Cinch it up like a champ to prevent rattles, and I think this is going to be interesting to see what effects it has on the fuel in the tank.
Next, was checking out the rear end fluid level when I discovered a source for a small drip under the parked car... Obviously, the plug is out in the pic, but this very top threaded plug was just hand tight with little to no sealant. It had weeped pretty well. I cleaned up the diff cover plate, topped off the Royal Purple fluid (in proper, lower fill hole ) and tightly secured this plug.
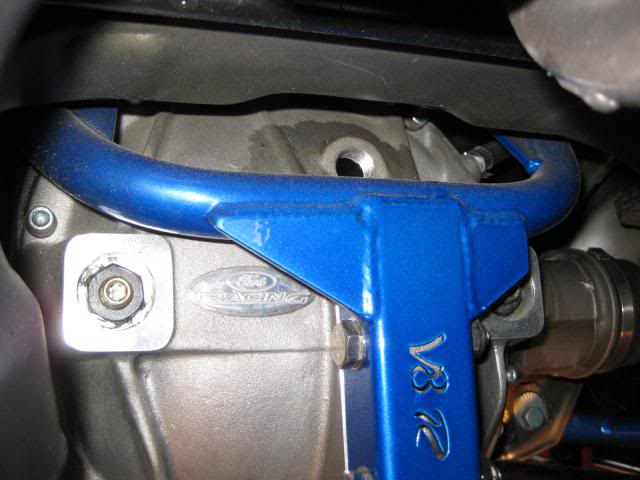
Two other tasks were finished tonight - and I'll get pictures soon of the Suzuki Cappuccino washer reservoir that's now mounted back of master cylinder for a more stealth appearance and lower-heat location. The other was checking air pressure. Funny thing is all tires were 45 psi!! Not sure if that is how they arrived from Good Win Racing or my alignment guy pumped 'em up for a particular reason??!!! Damn thing ought to ride like a Caddy now -- and it didn't really ride bad before!!!
I had almost forgot purchasing this exhaust wrap after reading RevLimiter's blog last Fall about this same product. I, like several other LS Miata cars I've read about, am concerned about heat and pressure build-up in the fuel tank so I installed this thing in about 10-15 minutes...

This particular one is 3 feet in length, is made of some heavy-duty, quilted material and with the integral brackets and st/st clamps, it stands off the exhaust pipe by approx. 1/4"-3/8" or so.

I slid it as far back as I could - which is just somewhat beside the Ford diff so it shields the above tank as best as possible. The front edge reaches probably to somewhere around the rear of the driver seat.

Cinch it up like a champ to prevent rattles, and I think this is going to be interesting to see what effects it has on the fuel in the tank.
Next, was checking out the rear end fluid level when I discovered a source for a small drip under the parked car... Obviously, the plug is out in the pic, but this very top threaded plug was just hand tight with little to no sealant. It had weeped pretty well. I cleaned up the diff cover plate, topped off the Royal Purple fluid (in proper, lower fill hole
 ) and tightly secured this plug.
Two other tasks were finished tonight - and I'll get pictures soon of the Suzuki Cappuccino washer reservoir that's now mounted back of master cylinder for a more stealth appearance and lower-heat location. The other was checking air pressure. Funny thing is all tires were 45 psi!! Not sure if that is how they arrived from Good Win Racing or my alignment guy pumped 'em up for a particular reason??!!! Damn thing ought to ride like a Caddy now -- and it didn't really ride bad before!!!
#210
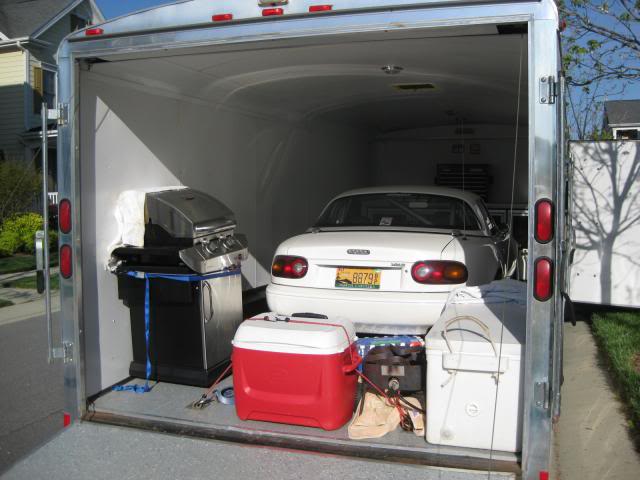
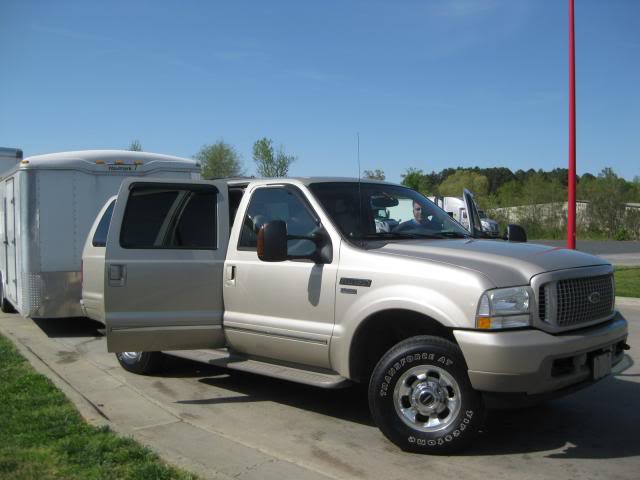
Had this most-excellent tow vehicle taking me on the 7 hour journey to N Georgia. My buddy was most gracious to haul my @ss and car down there and back with his modified 6.0L Powerstroke and 3 rows of leather seating...
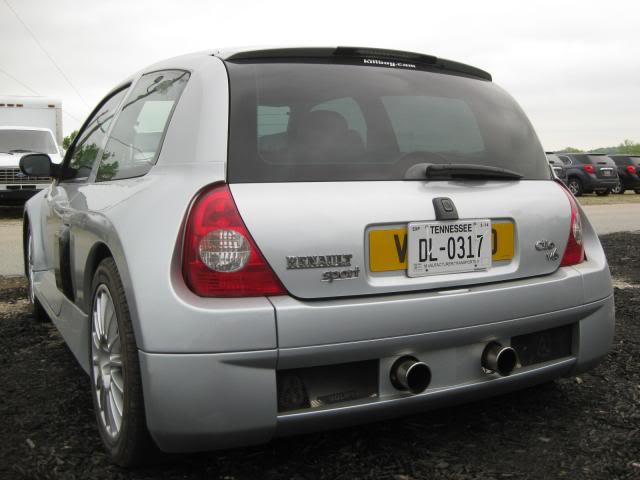
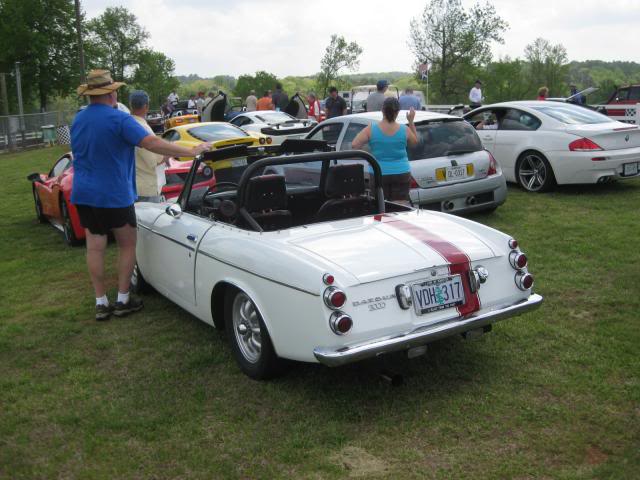
The Mitty is full of SWEET cars in and outside the paddock. Everybody I talked to were obvious gear heads and willing to tell you what the "brung" to the show. Some of them were Renault Clio, McLaren, 5.0L XKE, Datsun roadsters, you name it! Obviously the FM group brought some hot rods too!

Here's Moonshine (see FM.com build threads). It was delivered this Saturday to it's happy owner. He's about to take her on the track for some Touring Laps in his first time with his re-powered Roadster!
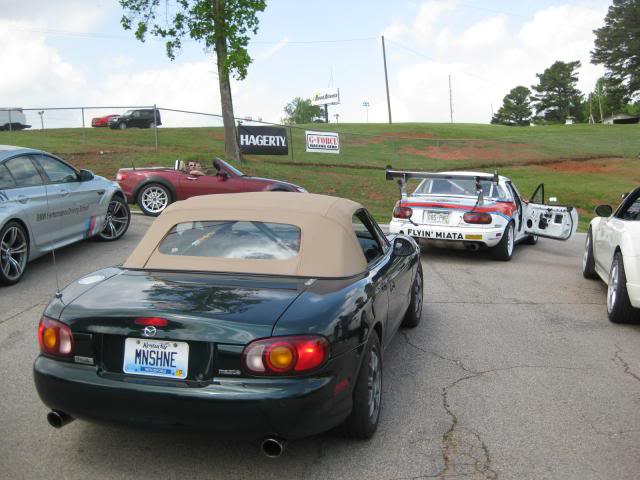
This is the Touring group for some hopefully quicker laps around Road Atlanta during the lunch hour on Friday...

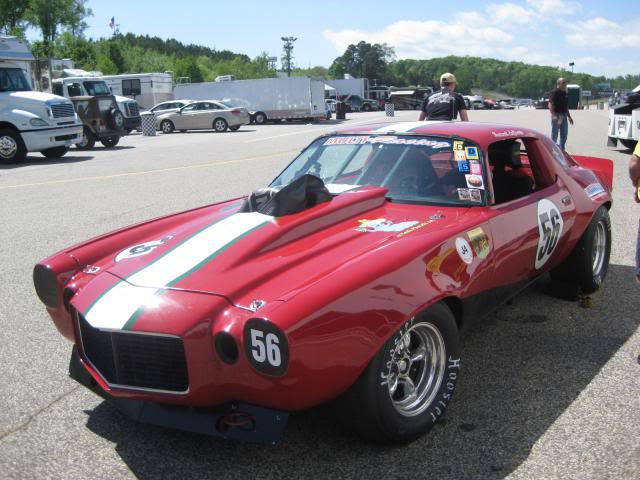
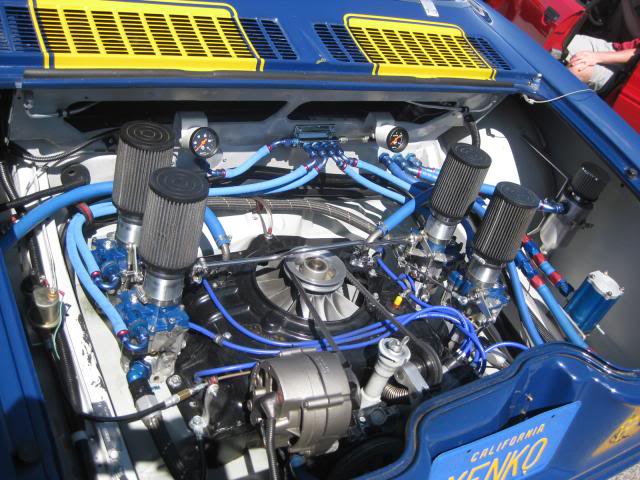
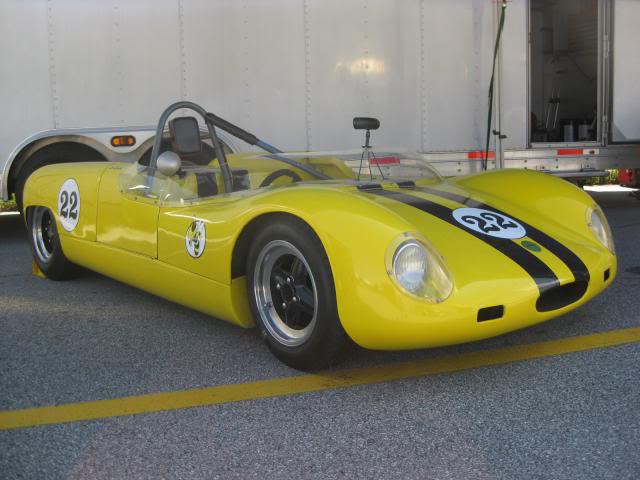
HOT vintage track cars where everywhere. I'd guess that about 400+ various sports cars, racers, GTP's, GTU's, GTO's, NASCAR, Formula 5000, 1, and Indy Lights were there. Gotta love the V8 power and sounds coming from the Shelbys, Vettes, Camaros, MGB-GTs, on and on...
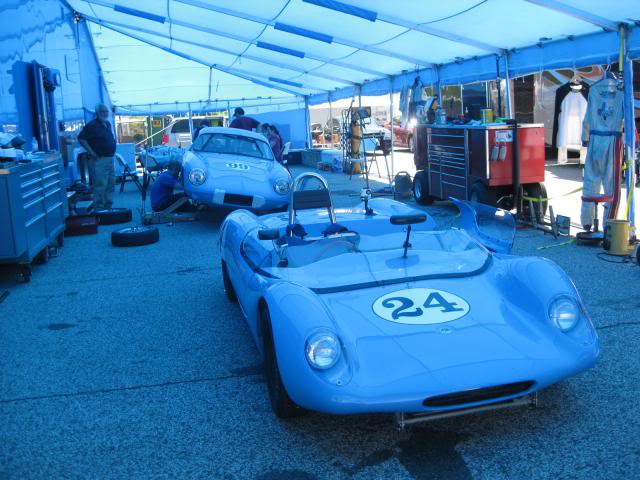
This guy had his Pete tractor, custom trailer, awning, and TWO Lotus racers all in matching Petty blue. This was the BADDEST set-up in the massive Road ATL paddock.
Gotta love a Bugeye Sprite - car ran beautifully on the track.

500+ HP Porsche 944 with old-school 80's BBS wheels
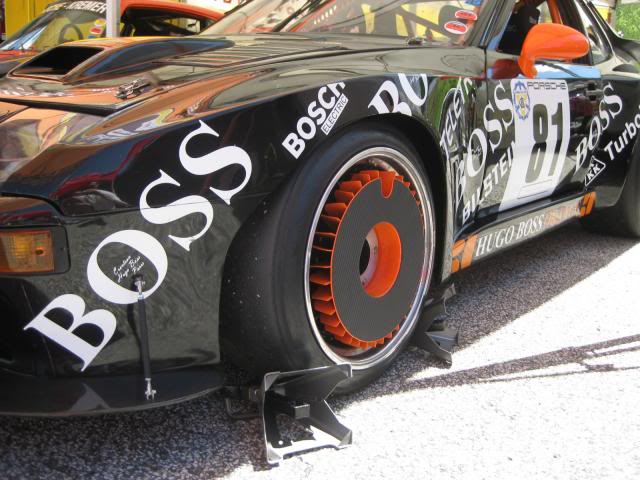
Early Vettes, Camaros, and Mustangs looked great.

#211
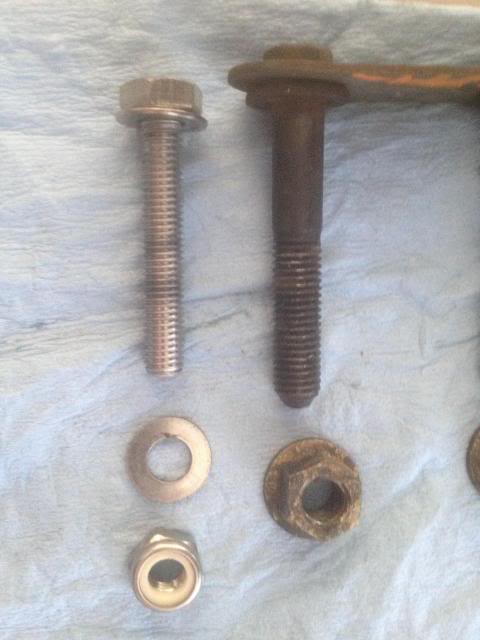
Been having 1 concern with the Roadster since the week before The Mitty - and that was a "THUNK" coming from the rear end. This noise, and just as equally, a feel you got when you either went from reverse to forward (or vise versa) or got on the throttle going up thru the gears... Something just wasn't right, and I had checked bolt tightness on everything at the rear of the car but never found anything that could cause concern. So, I've been stumped until Tad with the tow vehicle suggested last week that perhaps I had used smaller diameter bolts at the rear diff cover - V8R bracket. He felt like even a 1/8" difference would give that rear diff a chance to to move and make the THUNK.
So..., this weekend I went to the local LKQ, paid my $2 admission and located a set of factory bolts in a Mercury Cougar with its 8.8 rear end still fully intact! Got 'em out and paid the required $3.82 for said bolts and nuts.
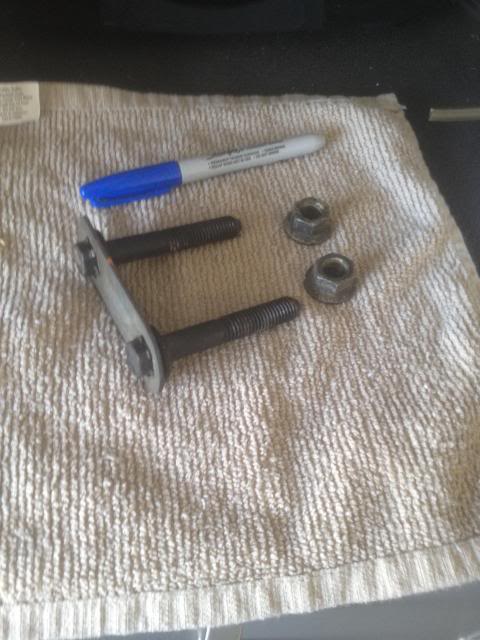
I knew these bolts and nuts were much larger than what I had somehow randomly selected and installed last year when I put my subassembly together. When I brought this Ford OEM bolts home, I jacked the car up and removed one bolt to compare... I think Tad got this one right, take a look:
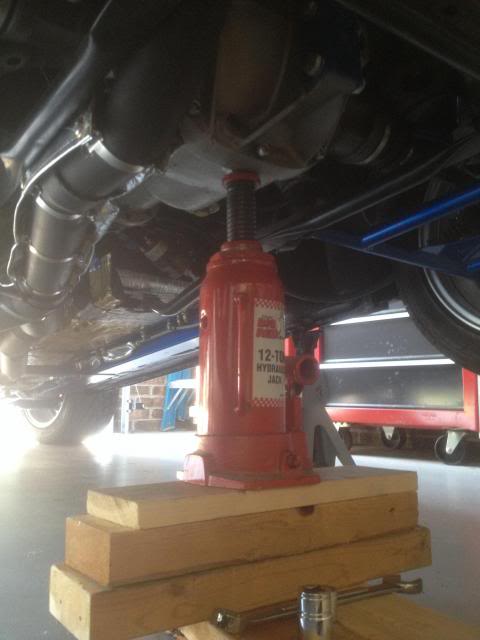
Supported the rear diff with the bottle jack - and could raise or lower the rear just a bit to get the diff cover bolt holes and the V8R rear bracket lined up properly for these fat bolts.
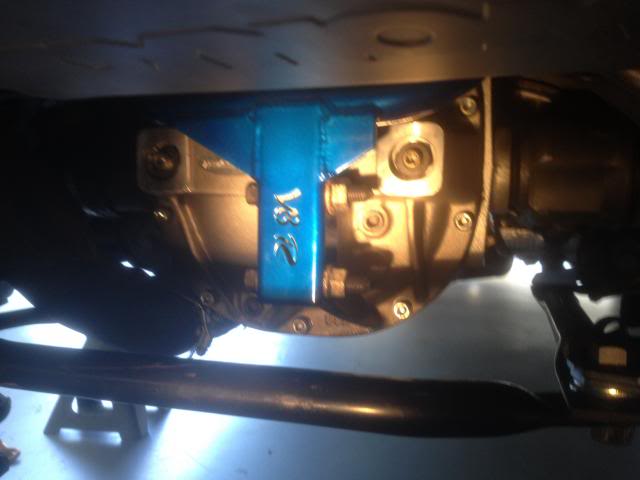
I sprayed a little WD-40 to help walk the bolts in place, tightened the nuts on, and let the car back down to the ground.
The wifey and I tonite took the V8Miata for a 20 minute drive to the restaurant for early Saturday dinner so I could confirm or deny Tad of his suspicions as to the cause of the worrisome THUNK. ...And damned if he ain't right!!! There is no more mystery THUNK from the rear of the Miata. Since I didn't remove this rear end originally from its donor car, I never had a thought as to how large the fasteners should be.
The car now has no rattles, noises (other than good V8 noises), vibrations, etc. It's just an awesome swap and another great running LS-powered Miata.
So..., this weekend I went to the local LKQ, paid my $2 admission and located a set of factory bolts in a Mercury Cougar with its 8.8 rear end still fully intact! Got 'em out and paid the required $3.82 for said bolts and nuts.

I knew these bolts and nuts were much larger than what I had somehow randomly selected and installed last year when I put my subassembly together. When I brought this Ford OEM bolts home, I jacked the car up and removed one bolt to compare... I think Tad got this one right, take a look:

Supported the rear diff with the bottle jack - and could raise or lower the rear just a bit to get the diff cover bolt holes and the V8R rear bracket lined up properly for these fat bolts.

I sprayed a little WD-40 to help walk the bolts in place, tightened the nuts on, and let the car back down to the ground.

The wifey and I tonite took the V8Miata for a 20 minute drive to the restaurant for early Saturday dinner so I could confirm or deny Tad of his suspicions as to the cause of the worrisome THUNK. ...And damned if he ain't right!!! There is no more mystery THUNK from the rear of the Miata. Since I didn't remove this rear end originally from its donor car, I never had a thought as to how large the fasteners should be.
The car now has no rattles, noises (other than good V8 noises), vibrations, etc. It's just an awesome swap and another great running LS-powered Miata.
Last edited by ToySnakePMC; 05-04-2014 at 12:51 AM.
#212
Time to post up on the build thread -- it's been like 2.5 months since anything has been added here. The good news is this V8Roadster has knocked down an easy 1200+ miles since completion - with pretty much no issues (knock on wood-laminate hotel desk for luck) since I ran out of fuel with that first tank... In full disclosure, I get a CEL about every 100 miles or so -- P0833, which is "clutch position sensor" or something like that. The PCM is simply looking for that GM switch that was on the original GTO clutch pedal. It creates no problems as I simply hit the odometer trip button and clear the code at any time -- thanks to my Speedhut Can/BUS gauges..
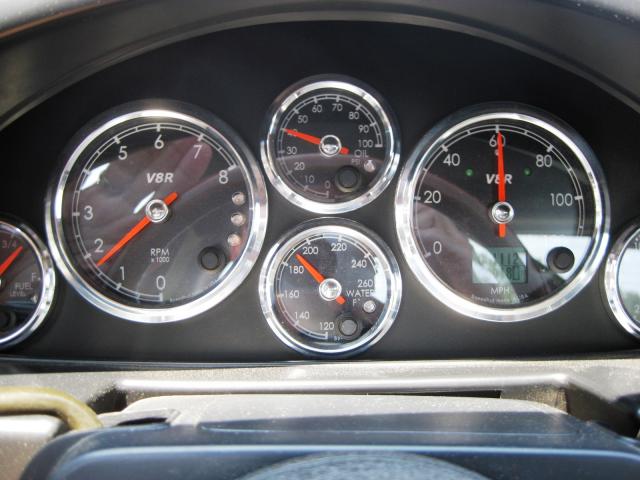
Here's what the command center looks like (bad cell phone pic) at 60 MPH on a 90F day... 1700-1725 rpm at sixty, 40 psi of oil pressure, and 190F water temp. Just a FYI, at 70 MPH this motor is chugging along at 1975 rpm with a slight bump in oil pressure. As a quick recap that's with a T56 at 0.57 overdrive and 3.31:1 rear ratio. Funny thing is that I barely know what lives beyond half throttle!! No lie. I think I've found a handful of times to romp down on it, but it gets SO quick SO fast with a pretty loud Dynomax VT muffler that draws attention at WOT. I need to get it to VIR or somewhere to let it open up more... Some day, right?
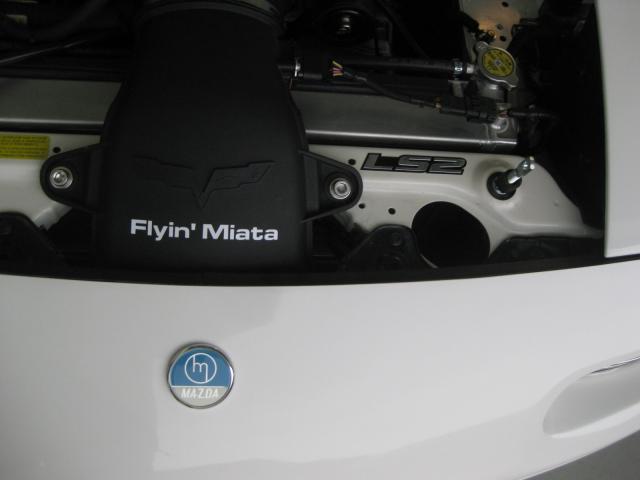
I've slowly added a few little bits to the build. First up is this simple LS2 badge up front. I thought I'd help out those who look at this lump under the hood and can't identify it. But then again, to most folks a LS1,2,3,& 6 all look pretty similar! That's fine - as I like 'em all.
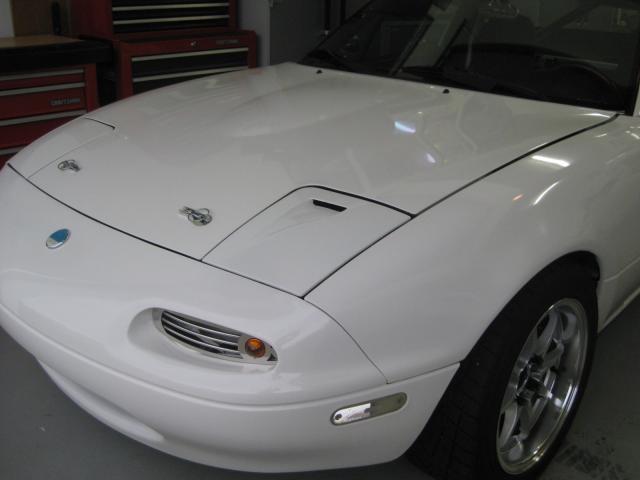
Decided to pull this NACA duct, fiberglass headlight lid out of the cabinet and try it on for a while. I got this off of eBay about 9 years ago and had it painted Mazda PT white about 7 yrs ago but never installed it. It's been debated that these don't do much - or anything perhaps - to funnel cold air under the hood, but it looks good!
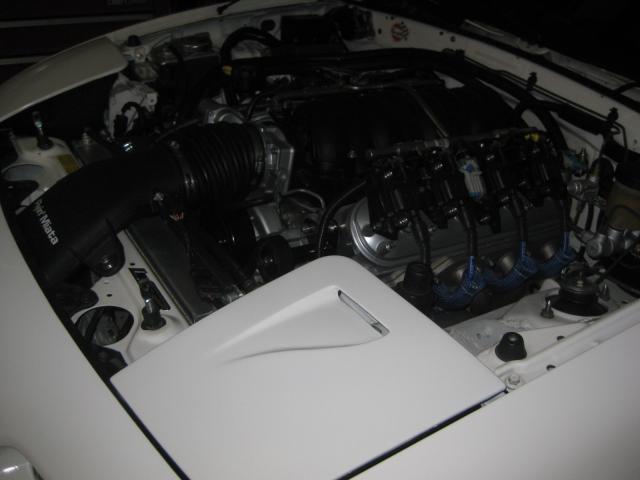
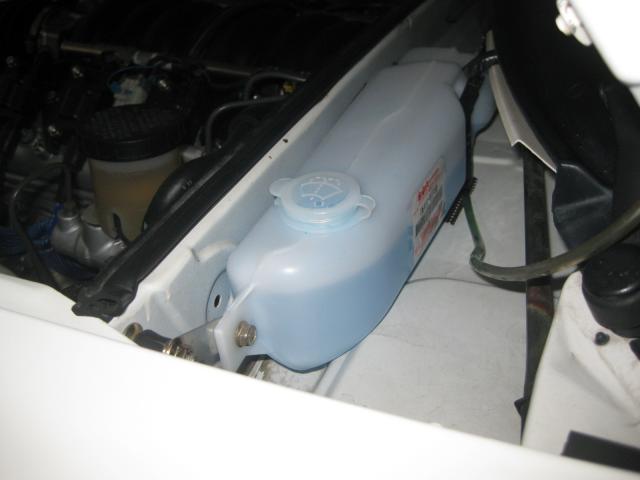
Probably have mentioned this a while back, but here's the Suzuki Cappuccino washer bottle/ remote mount. I fab'd a simple stainless steel bracket, re-used the Mazda washer pump that pops right into place, and filled it up. The wiring was already extended and re-wrapped for this during the wiring diet last year...
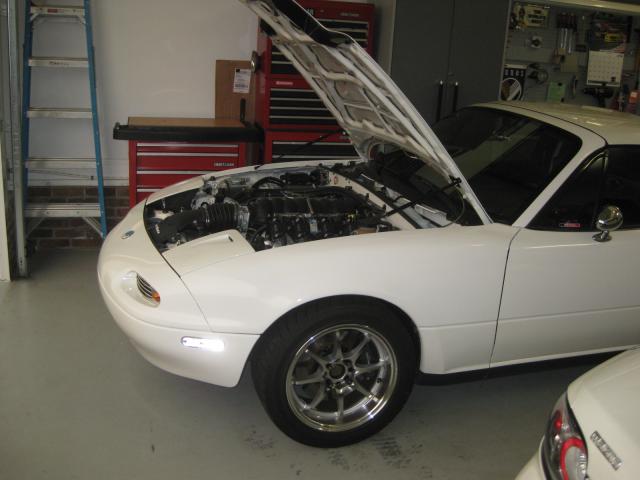
...Now the one option that works well, but has a drawback equally as big that just kills it for me. The Rspeed hood struts. Kit had zero instructions, and no matter what I did to insert extra or delete washers where this thing bolts in -- I could not stop it from lifting the rear of the hood UP when the hood was closed. I will live with it for now and keep an eye out for someone who has fixed this simple thing, or I will dump it and go back to a 4' wooden handle/ hood prop that the wife hates! Look closely and you'll see 'em holding the hood up. Pretty amazing stuff...
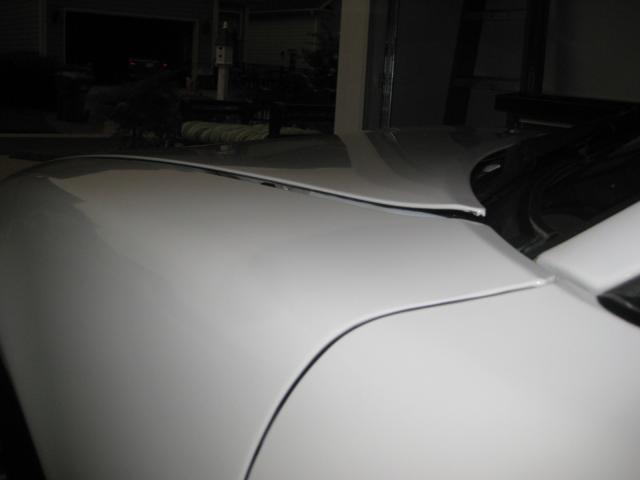
Here's the hateful part. My hood used to lay flat and line up perfectly with the fenders. Now it's kicked up. This pic makes it look really bad, but it is what it is!
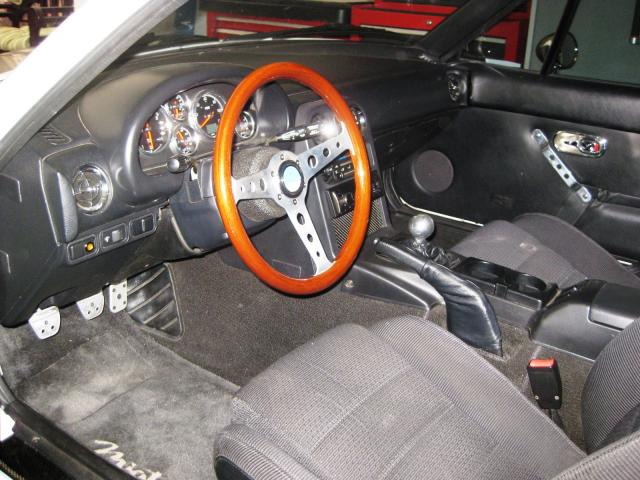
Interior shot. Not very good, but I don't think I've captured the final and very much OEM interior. This is a '90 dash swap in this '94 to simplify things and make it more pleasing to my eye! I REALLY want to find a local photographer who is passionate for cars and would be willing to do a photo shoot to do this car justice. When that day comes, pics like this below will actually be pleasing to look at!
And a few parting, exterior pics... I did a clay bar session the other week, and the 20 yr-old paint is slick as a whistle now!
About the only mods I'm considering now are either OEM mudflaps or possibly some flat, black plastic rallye flaps (think WRX-STI) and insert some hood, heat-extraction vents. There's a fair amount of heat under these hoods after cruising around town, and I'm not too fond of that. And lastly (for now at least) I will have to get the A/C plumbed and working. Think I'll do this in the Fall, when I don't need it - only because I want to enjoy this car and not work on it for the few, free days I get this summer to drive it!
Here's what the command center looks like (bad cell phone pic) at 60 MPH on a 90F day... 1700-1725 rpm at sixty, 40 psi of oil pressure, and 190F water temp. Just a FYI, at 70 MPH this motor is chugging along at 1975 rpm with a slight bump in oil pressure. As a quick recap that's with a T56 at 0.57 overdrive and 3.31:1 rear ratio. Funny thing is that I barely know what lives beyond half throttle!! No lie. I think I've found a handful of times to romp down on it, but it gets SO quick SO fast with a pretty loud Dynomax VT muffler that draws attention at WOT. I need to get it to VIR or somewhere to let it open up more... Some day, right?

I've slowly added a few little bits to the build. First up is this simple LS2 badge up front. I thought I'd help out those who look at this lump under the hood and can't identify it. But then again, to most folks a LS1,2,3,& 6 all look pretty similar! That's fine - as I like 'em all.

Decided to pull this NACA duct, fiberglass headlight lid out of the cabinet and try it on for a while. I got this off of eBay about 9 years ago and had it painted Mazda PT white about 7 yrs ago but never installed it. It's been debated that these don't do much - or anything perhaps - to funnel cold air under the hood, but it looks good!


Probably have mentioned this a while back, but here's the Suzuki Cappuccino washer bottle/ remote mount. I fab'd a simple stainless steel bracket, re-used the Mazda washer pump that pops right into place, and filled it up. The wiring was already extended and re-wrapped for this during the wiring diet last year...

...Now the one option that works well, but has a drawback equally as big that just kills it for me. The Rspeed hood struts. Kit had zero instructions, and no matter what I did to insert extra or delete washers where this thing bolts in -- I could not stop it from lifting the rear of the hood UP when the hood was closed. I will live with it for now and keep an eye out for someone who has fixed this simple thing, or I will dump it and go back to a 4' wooden handle/ hood prop that the wife hates! Look closely and you'll see 'em holding the hood up. Pretty amazing stuff...


Here's the hateful part. My hood used to lay flat and line up perfectly with the fenders. Now it's kicked up. This pic makes it look really bad, but it is what it is!

Interior shot. Not very good, but I don't think I've captured the final and very much OEM interior. This is a '90 dash swap in this '94 to simplify things and make it more pleasing to my eye! I REALLY want to find a local photographer who is passionate for cars and would be willing to do a photo shoot to do this car justice. When that day comes, pics like this below will actually be pleasing to look at!

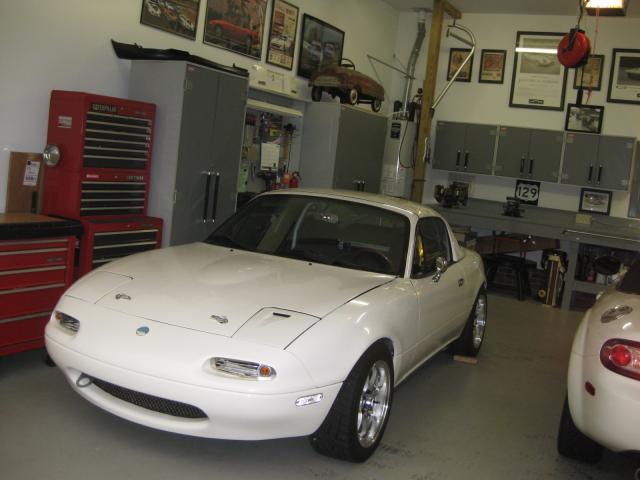
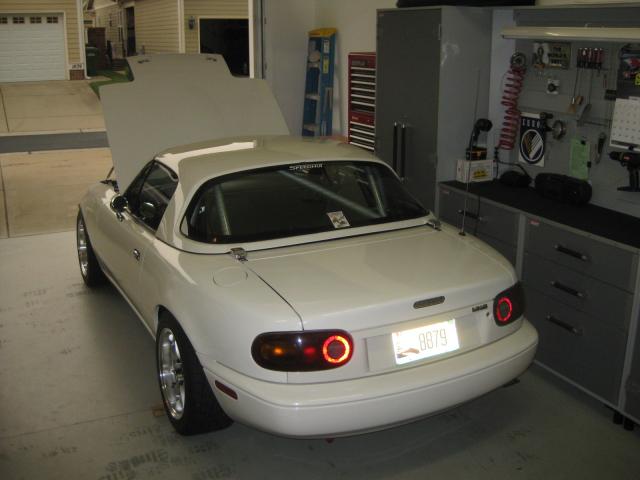
And a few parting, exterior pics... I did a clay bar session the other week, and the 20 yr-old paint is slick as a whistle now!


About the only mods I'm considering now are either OEM mudflaps or possibly some flat, black plastic rallye flaps (think WRX-STI) and insert some hood, heat-extraction vents. There's a fair amount of heat under these hoods after cruising around town, and I'm not too fond of that. And lastly (for now at least) I will have to get the A/C plumbed and working. Think I'll do this in the Fall, when I don't need it - only because I want to enjoy this car and not work on it for the few, free days I get this summer to drive it!
Last edited by ToySnakePMC; 06-28-2015 at 06:47 PM.
#213
Great to hear from you Pat! The car looks great and I'm glad you are enjoying it.
Hate to tell you this but your hood struts are in backwards. You flip those babies over so the big part is on the fender rather than the hood and that bump will be gone. I know it doesn't make sense but mine looked exactly like that when I had them in the way you do now. If you want to see it the 3rd and 4th photo from the bottom shows them wrong and the bottom one shows them right in this post:
http://jimsmiata.blogspot.com/2013/0...le-bugger.html
Last edited by charchri4; 07-24-2014 at 09:24 AM.
#214
I wish my garage looked like that.....so clean....and organized, lookin good.
you should swap out those chrome handles for something black, those are the only things that dont mesh with the rest of the interior.
those hood struts would bug me too if it popped my hood up like that? does the hood pop up without the struts?
how about trying the hood struts in reverse, where the top of the strut goes forward?
like these.
http://www.installuniversity.com/ins...ut_locator.jpg
#215
Hey Jim! Thanks for chiming in & nothing to hate about getting a quick tip on the hood struts. And, I remember reading that post of yours a while back - but that was long before I considered getting these in from FM. I think I did everything BUT turn the struts backwards - maybe I thought that shouldn't have any affect... who knows. I'll swap them around when I get home this week.
And hello Nowak - No, the hood did lay perfectly in line with the LH and RH fenders until I mounted these struts. I don't believe the hood is now in a bind as the hood hinges just seem to have a bit of pressure that's kicking them up. Thanks for the comments too. Just cleaned the garage a few wknds ago - hope we can keep it like this for a while! And I wish I had better interior pics because the little bit of interior chrome trim items that I've added over the 10 yrs or so do appear quite pleasing when you see it in person. At least I think it does!
Best regards, PMC
#216
Brief update for Sept '14 - V8Miata has approx 1650 miles - and continues to run great with no squeaks, rattles, CEL's, etc. Drove it to VIR for the Tudor Sportscar Racing weekend - so that's the farthest from home - about 2 hours, and it ran really well. So the car is awesome 99% of the time. The other 1% is when the fuel pump or GM fuel pump relay or fuel pump elec connector at top of tank refuses to play nice... I've had 4 episodes since April where the car is being good and then you twist the key at any random time (cold engine or hot engine) and the DW fuel pump doesn't do its 2 second prime - just dead quiet. Happened again last nite on a frozen yogurt run (woohoo - we're just crazy people, aren't we!) with the wifey and it didn't crank when I wanted to leave the joint. Anywho, either when I jiggled the connector or smacked the top of the fuel tank cover (where the plumbing and wiring are attached) with a screwdriver -- the fuel pump primed, car started perfectly, and drove it the 10 miles home. I'm going to replace the harness connector at FP next week when I get home from work (thanks Chris!) and see if that cures what pains me. If not, maybe the DW pump has a dead spot on the windings and it won't start on those random times, I don't know... We'll find out soon enough, I hope.
On a good note, the brown truck dropped off four new round things. These Enkeis are from Good Win Racing (where original wheels and tires were purchased from), and are the RPF1's in 15x8 size with 28mm backspacing. While I very much like the looks of my reproduction RAYS CE28 wheels in same size with 25mm backspacing, I just want to know that I will have some wheels under neath this car at those rare triple digit speeds (101 mph on a closed course, thank you very much) that are BUILT to hold up under cornering, braking, and accelerating. These Konig repro wheels are an unknown entity in my book - but they have done well so far, they look awesome, but they will go to a new home on CL one day soon. So, here's what I need to swap the 225's onto:
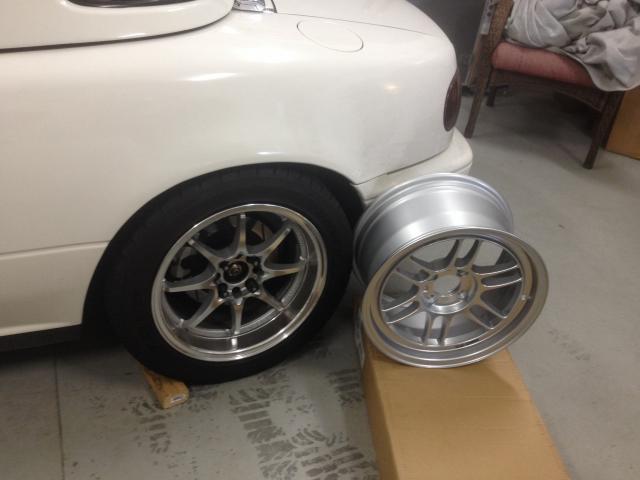
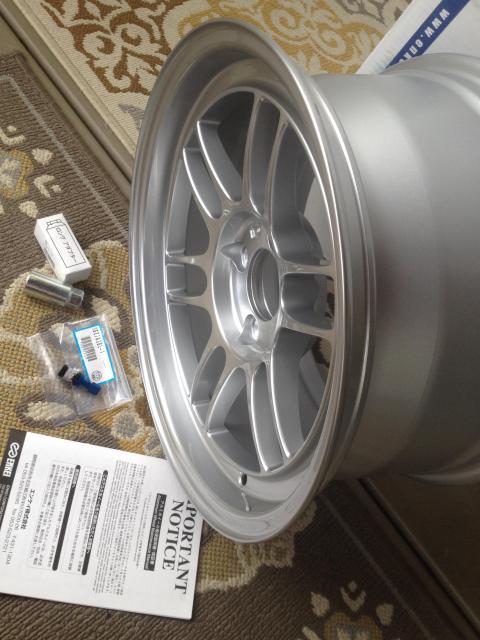
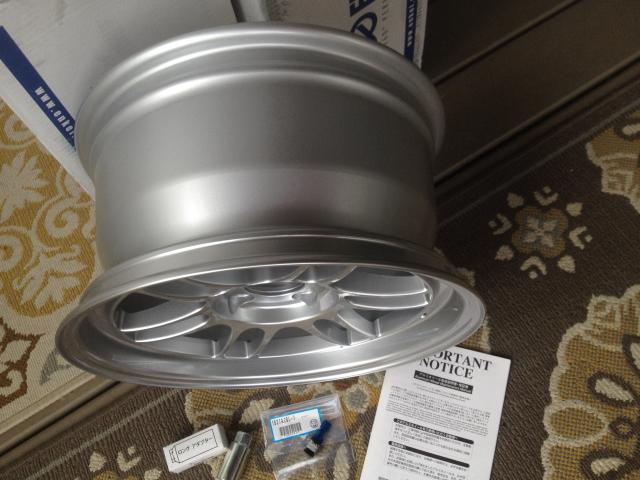
On a good note, the brown truck dropped off four new round things. These Enkeis are from Good Win Racing (where original wheels and tires were purchased from), and are the RPF1's in 15x8 size with 28mm backspacing. While I very much like the looks of my reproduction RAYS CE28 wheels in same size with 25mm backspacing, I just want to know that I will have some wheels under neath this car at those rare triple digit speeds (101 mph on a closed course, thank you very much) that are BUILT to hold up under cornering, braking, and accelerating. These Konig repro wheels are an unknown entity in my book - but they have done well so far, they look awesome, but they will go to a new home on CL one day soon. So, here's what I need to swap the 225's onto:


#217
Well.., long time - no posting, but the dreaded winter is receding and warmer temps are now rolling in! So, I'm inspired to update the thread in preparation of The Mitty at Rd ATL in 4-5 weeks. So some of these pics are from the last few months but worthy of an update.
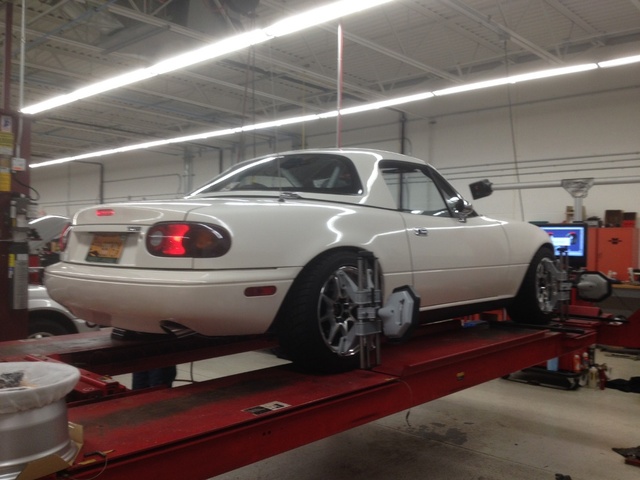
Since the new Enkei's needed to go on the V8R, I made an appointment at The Digital Chassis in Durham, NC back in October to get the tires yanked off the Rotas and mounted on the RPF-1's. Prior to that, we decided that the "Lanny Alignment" was less than desirable with its pretty severe rear camber settings. So, the proprietor did some nice work with setting up the Miata (he's a Porsche chassis expert) to allow it to track straighter and put more rear tire to the ground!
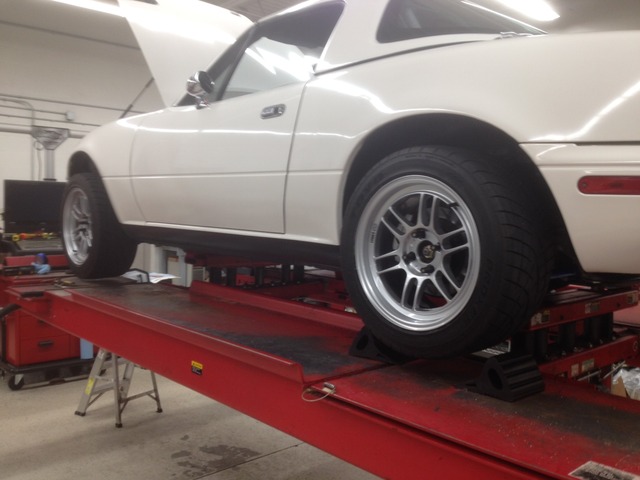
And with the chassis all in-spec, it was time to mount and balance the Toyo Proxes on the Enkei's. These 15x8's weigh around 11.3 lbs, IIRC... They feel great, car drives better than ever, and with the proper alignment, it's lost any twitchiness in the wheel as it tracks just spot on!
Jump to just this past weekend for the next update as the V8R didn't see much action during this past wet winter - other than January's Cars & Coffee in Raleigh. And what a great gathering that was - 400 +/- cars - just a hoot with some serious Miata guys driving up from eastern NC. We had a blast as they took rides to feel some V8 torque in the familiar Miata. I think I laughed and enjoyed the day more than they did! Fun stuff...
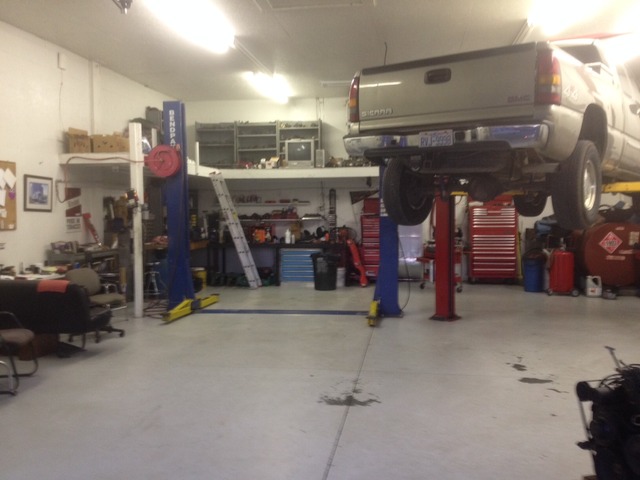
So this weekend, I decided to yank out the Mazda battery cable that MAY be giving me some concern... just not certain. My engine turns over a bit slow - despite replacing the battery last summer with the upgraded, 650 CCA battery. Perhaps the small (4 ga??) Mazda wire just couldn't delivers the amps needed to spin the 6.0L quickly. And with that in mind, I purchased and installed about 9 feet of Hobart 2 gauge welding cable between the starter solenoid and the trunk-mounted battery This was the friend's lift that I "stole" this Sunday afternoon. Of course, I remember to take pics after I get the car off the lift...
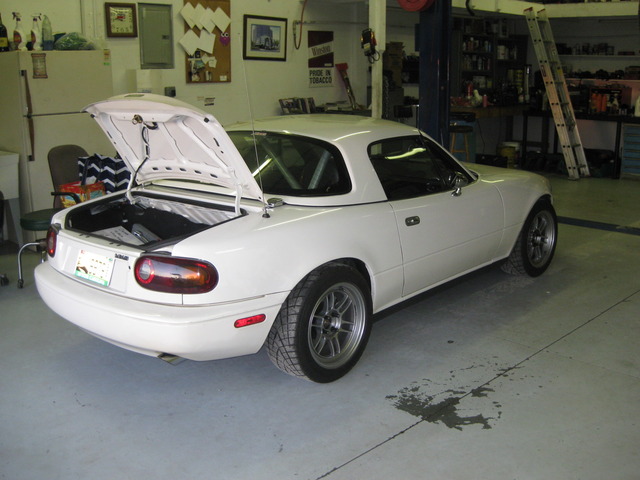
Battery hooked back up, crank 'er up, and... it's pretty much the same thing... Maybe on some upcoming hot starts, it will crank a bit quicker. Hope so.
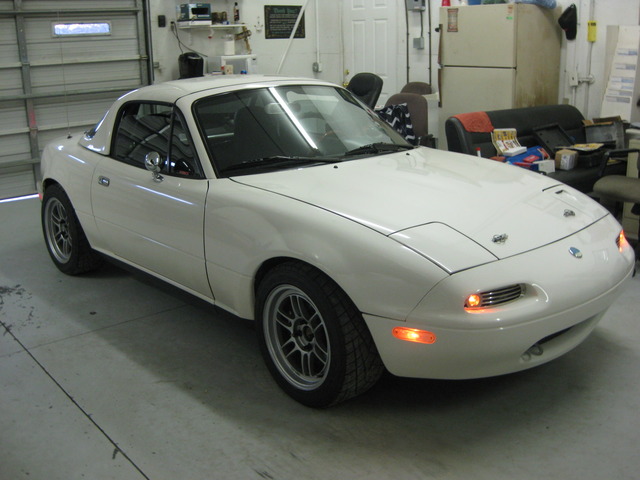
Car is dirty - probably washed once in 2014 as it covered it's inaugural 2300 miles. Probably do an oil change before The Mitty and confirm everything is secure and tightly screwed together. Oh yeah, and give her a quick detail too...
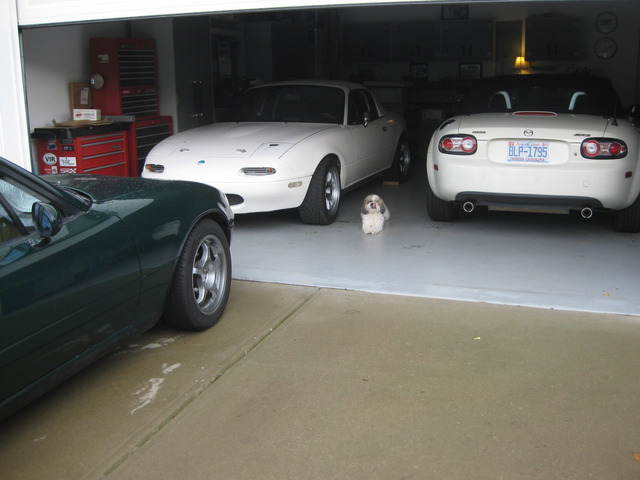
Drove her back to the home garage to shut her in for the week... Then again, it's supposed to hit 80F tomorrow. Maybe I should see how it cranks at various times on a 40-50 mile drive tomorrow. That sounds better than work for some reason! I even think Lexi approves of the plan.

Since the new Enkei's needed to go on the V8R, I made an appointment at The Digital Chassis in Durham, NC back in October to get the tires yanked off the Rotas and mounted on the RPF-1's. Prior to that, we decided that the "Lanny Alignment" was less than desirable with its pretty severe rear camber settings. So, the proprietor did some nice work with setting up the Miata (he's a Porsche chassis expert) to allow it to track straighter and put more rear tire to the ground!

And with the chassis all in-spec, it was time to mount and balance the Toyo Proxes on the Enkei's. These 15x8's weigh around 11.3 lbs, IIRC... They feel great, car drives better than ever, and with the proper alignment, it's lost any twitchiness in the wheel as it tracks just spot on!
Jump to just this past weekend for the next update as the V8R didn't see much action during this past wet winter - other than January's Cars & Coffee in Raleigh. And what a great gathering that was - 400 +/- cars - just a hoot with some serious Miata guys driving up from eastern NC. We had a blast as they took rides to feel some V8 torque in the familiar Miata. I think I laughed and enjoyed the day more than they did! Fun stuff...

So this weekend, I decided to yank out the Mazda battery cable that MAY be giving me some concern... just not certain. My engine turns over a bit slow - despite replacing the battery last summer with the upgraded, 650 CCA battery. Perhaps the small (4 ga??) Mazda wire just couldn't delivers the amps needed to spin the 6.0L quickly. And with that in mind, I purchased and installed about 9 feet of Hobart 2 gauge welding cable between the starter solenoid and the trunk-mounted battery This was the friend's lift that I "stole" this Sunday afternoon. Of course, I remember to take pics after I get the car off the lift...

Battery hooked back up, crank 'er up, and... it's pretty much the same thing... Maybe on some upcoming hot starts, it will crank a bit quicker. Hope so.

Car is dirty - probably washed once in 2014 as it covered it's inaugural 2300 miles. Probably do an oil change before The Mitty and confirm everything is secure and tightly screwed together. Oh yeah, and give her a quick detail too...

Drove her back to the home garage to shut her in for the week... Then again, it's supposed to hit 80F tomorrow. Maybe I should see how it cranks at various times on a 40-50 mile drive tomorrow. That sounds better than work for some reason! I even think Lexi approves of the plan.
#218
Finally finished reading your thread from front to back. I'm in awe of your impeccable attention to detail. I also foresee myself doing things the way you have in the future and using your thread as a reference.
One thing I don't understand is how you're able to put so few miles on the car? When mine is done it's going to get some miles racked up. I plan on taking it to deals gap this fall if it's done by then. How close are you to the dragon/deals gap? I'd LOVE to see your car.
One thing I don't understand is how you're able to put so few miles on the car? When mine is done it's going to get some miles racked up. I plan on taking it to deals gap this fall if it's done by then. How close are you to the dragon/deals gap? I'd LOVE to see your car.
#219
Thanks Steve! I'm glad you found time to read thru the build thread and hope it either gave you an idea to try or save you some time trying to figure out a next step to take. This is the only thing I've ever posted up before and it was a LOT of fun writing up and sharing... Your current V8M build is gonna be a blast for you and it's fun to see more builds come on-line as this forum gains more momentum.
My low miles so far (as I reach my upcoming 1 yr completion) is sorta low, I guess. I've been a weenie with not driving it more than I have, but work, family, and life has kept me busy and not on the road in this thing. Oh yeah, then there's that current project car, 3 series BMW wagon, that I picked off of eBay last fall. And I've just been getting it road-worthy with all maintenance and service needs done in my shop... One things for sure: a 25 yr-old Mazda ages MUCH more gracefully than an 11 yr-old BMW does. All the German plastic under the hood gets so brittle and can create up to a dozen OBD codes to fire off! ...I think I'm a JDM car lover for life after this current learning and fun experience!
My low miles so far (as I reach my upcoming 1 yr completion) is sorta low, I guess. I've been a weenie with not driving it more than I have, but work, family, and life has kept me busy and not on the road in this thing. Oh yeah, then there's that current project car, 3 series BMW wagon, that I picked off of eBay last fall. And I've just been getting it road-worthy with all maintenance and service needs done in my shop... One things for sure: a 25 yr-old Mazda ages MUCH more gracefully than an 11 yr-old BMW does. All the German plastic under the hood gets so brittle and can create up to a dozen OBD codes to fire off! ...I think I'm a JDM car lover for life after this current learning and fun experience!
#220
As mentioned elsewhere on V8M.net, The Mitty 2015 at Road Atlanta is coming up in less than 2 weeks - and have a few things to do in preparation.
Been a busy, short weekend and I fly out tonite (Sunday, which is unusual - thank goodness....). So, I didn't tackle much. But I THINK I got rid of a winter bug that's plagued the car the past few months - and it got worse this Friday evening. And that is long start, that became a fast "click-click-click..." then start, and eventually it turned into NO Crank. Fuel pump would prime, but nothing! And that's after being on the trickle charger for last 7 days...? Yikes.
So Saturday afternoon, the first thing I do is snag the 12 month old battery out and take it back to Advance Auto so they can check the CCA, etc... Their counter man hooked up to battery with their small machine, typed in pertinent battery info, and then printed out a reading. My 650cca battery appeared capable of 751cca and looked good to this guy. Rats, I thought I had a battery that just had no muscle left in it. Back to square one...
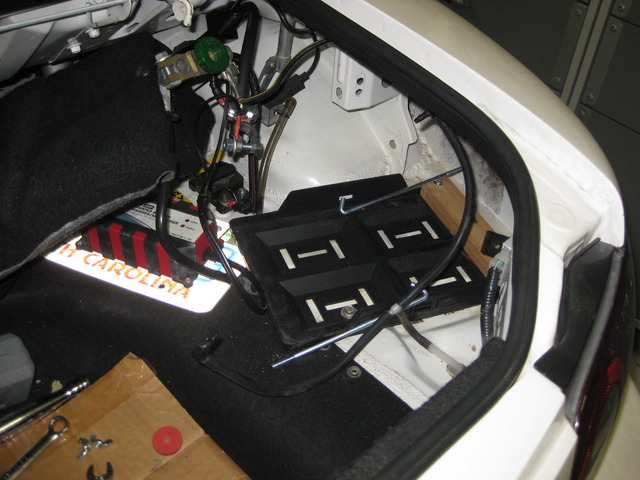
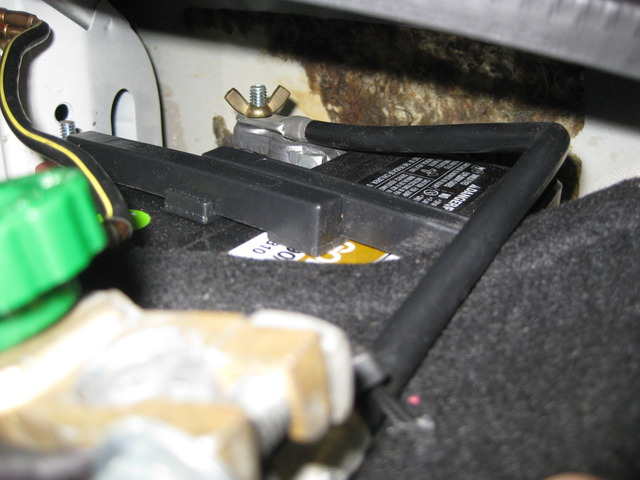
Well, while I'm at this point, here's my battery arrangement. It's a larger battery for some BMW and has vent ports on LH and RH ends that I used some small vacuum 90 degree elbows to adapt my Mazda battery vent tubes to.
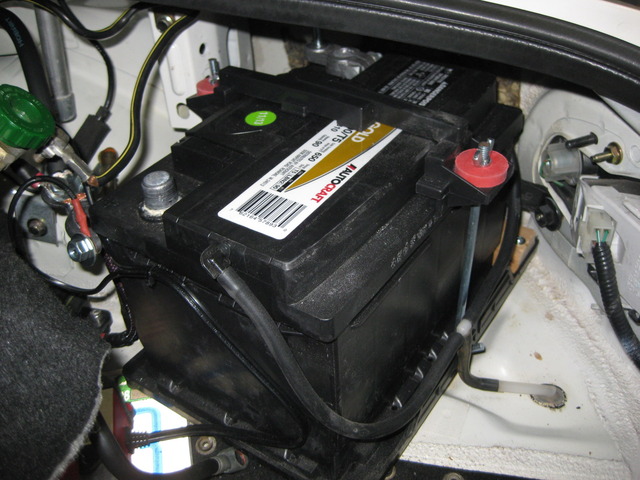
It sits on this plastic tray that I was able to add a block of wood to keep the battery snug left-to-right. I utilized the threaded holes in trunk floor for old Mazda battery bracket. The 110V trickle-charger is bolted to an old license plate, and the plate is bolted using existing spare tire bolt hole. So, everything is snug and bolted down without drilling new holes in the car...
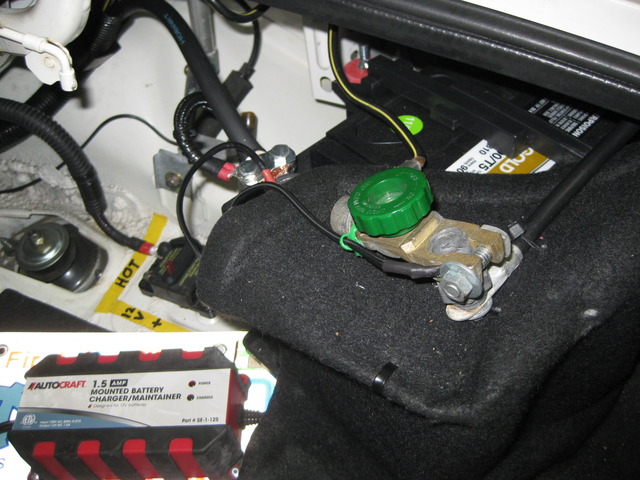
And, I have a series of adapters, short wire, and remote cut-off switch on the ground wire. Kinda weird, I know, but I had a Mazda gel cell battery blow up one day at work in this car back in the days of 1.8L power! Ever since, I've wanted to be able to easily kill power if I want to.
OK, so at this point, I still have a car that won't start...
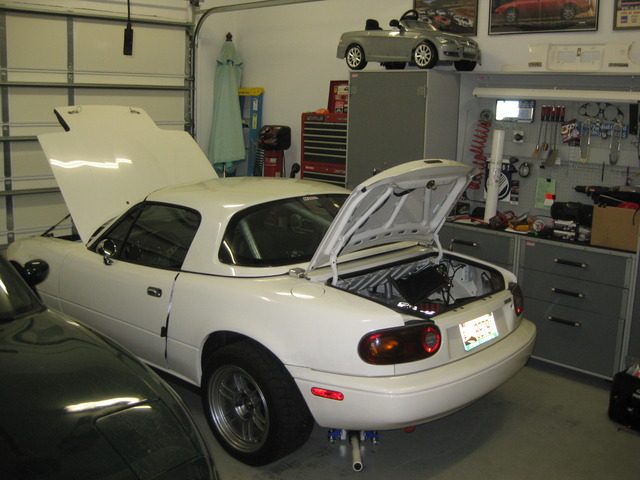
My next efforts are to check related Mazda fuses for my starter circuit (key switch stuff) and they all look good. That doesn't appear to be the problem.
I take a break, scratch my head, and log onto LS1tech.com and do some quick searches on GTO starter failure. I find one or two threads that begin to scare me into thinking mine has finally died a premature death. So, I want to poke around this thing and see what's up, perhaps...
I yank the RH front tire off, start looking around (with battery disconnected at this point) and low and behold, I find a loose nut on starter solenoid. It's like hand tight - when I move the wire left or right, the nut follows it.
It's hard to see, but it's the small nut in the orange circle. (As a side note, here's a little secret: the larger wire zip-tied just below WAS the 4 gauge factory Mazda wire from the battery that I replaced a month or so ago with 2 gauge. I have the wire left under the car - and will remove it the day I have to drop the T56 for some reason - but not sooner!)
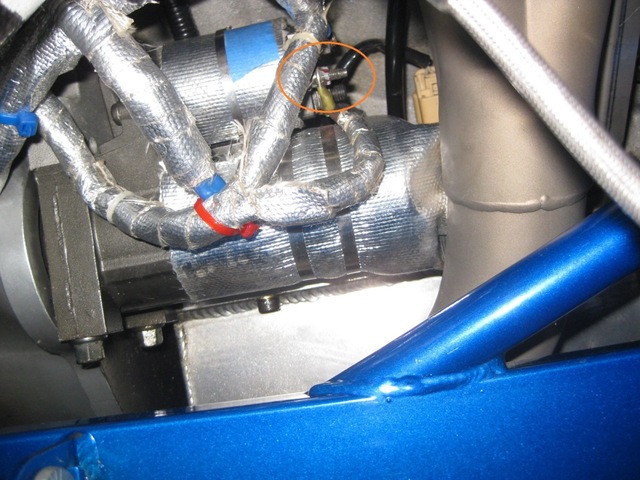
Awesome NEWS !!!! It fired right up! No more ticking or too sluggish starts. I also tightened up what I think was a somewhat loose ground connection at the above mentioned battery wiring. Car can go to Atlanta and not sit on the sidelines for the next few weeks, hooray.
Ran the motor till warm, and dropped my 6.5 qts of Valvoline 5w-30 synthetic into a drain pan, tightened up oil pan bolts (all seemed tight already) in search of elusive, slight seeping of oil...?
Now just have to clean the V8R up next weekend and get stuff packed up for The Mitty. Hope to see you there!!!!!
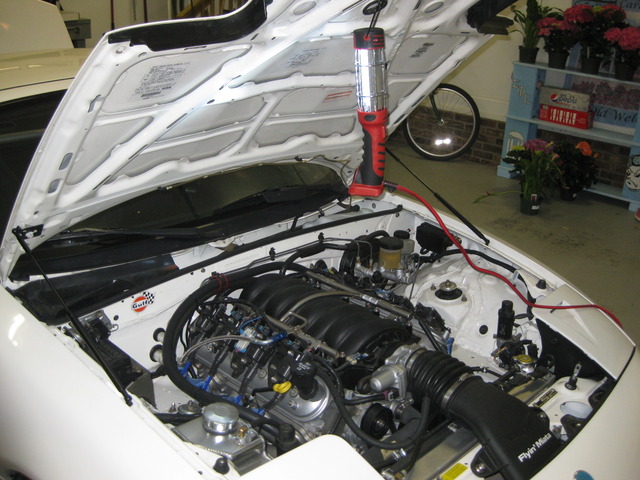
Been a busy, short weekend and I fly out tonite (Sunday, which is unusual - thank goodness....). So, I didn't tackle much. But I THINK I got rid of a winter bug that's plagued the car the past few months - and it got worse this Friday evening. And that is long start, that became a fast "click-click-click..." then start, and eventually it turned into NO Crank. Fuel pump would prime, but nothing! And that's after being on the trickle charger for last 7 days...? Yikes.
So Saturday afternoon, the first thing I do is snag the 12 month old battery out and take it back to Advance Auto so they can check the CCA, etc... Their counter man hooked up to battery with their small machine, typed in pertinent battery info, and then printed out a reading. My 650cca battery appeared capable of 751cca and looked good to this guy. Rats, I thought I had a battery that just had no muscle left in it. Back to square one...
Well, while I'm at this point, here's my battery arrangement. It's a larger battery for some BMW and has vent ports on LH and RH ends that I used some small vacuum 90 degree elbows to adapt my Mazda battery vent tubes to.

It sits on this plastic tray that I was able to add a block of wood to keep the battery snug left-to-right. I utilized the threaded holes in trunk floor for old Mazda battery bracket. The 110V trickle-charger is bolted to an old license plate, and the plate is bolted using existing spare tire bolt hole. So, everything is snug and bolted down without drilling new holes in the car...

And, I have a series of adapters, short wire, and remote cut-off switch on the ground wire. Kinda weird, I know, but I had a Mazda gel cell battery blow up one day at work in this car back in the days of 1.8L power! Ever since, I've wanted to be able to easily kill power if I want to.


OK, so at this point, I still have a car that won't start...

My next efforts are to check related Mazda fuses for my starter circuit (key switch stuff) and they all look good. That doesn't appear to be the problem.
I take a break, scratch my head, and log onto LS1tech.com and do some quick searches on GTO starter failure. I find one or two threads that begin to scare me into thinking mine has finally died a premature death. So, I want to poke around this thing and see what's up, perhaps...
I yank the RH front tire off, start looking around (with battery disconnected at this point) and low and behold, I find a loose nut on starter solenoid. It's like hand tight - when I move the wire left or right, the nut follows it.
It's hard to see, but it's the small nut in the orange circle. (As a side note, here's a little secret: the larger wire zip-tied just below WAS the 4 gauge factory Mazda wire from the battery that I replaced a month or so ago with 2 gauge. I have the wire left under the car - and will remove it the day I have to drop the T56 for some reason - but not sooner!)

Awesome NEWS !!!! It fired right up! No more ticking or too sluggish starts. I also tightened up what I think was a somewhat loose ground connection at the above mentioned battery wiring. Car can go to Atlanta and not sit on the sidelines for the next few weeks, hooray.
Ran the motor till warm, and dropped my 6.5 qts of Valvoline 5w-30 synthetic into a drain pan, tightened up oil pan bolts (all seemed tight already) in search of elusive, slight seeping of oil...?
Now just have to clean the V8R up next weekend and get stuff packed up for The Mitty. Hope to see you there!!!!!

#221
Long time.., no post, but want to toss up a few pics and one concern.
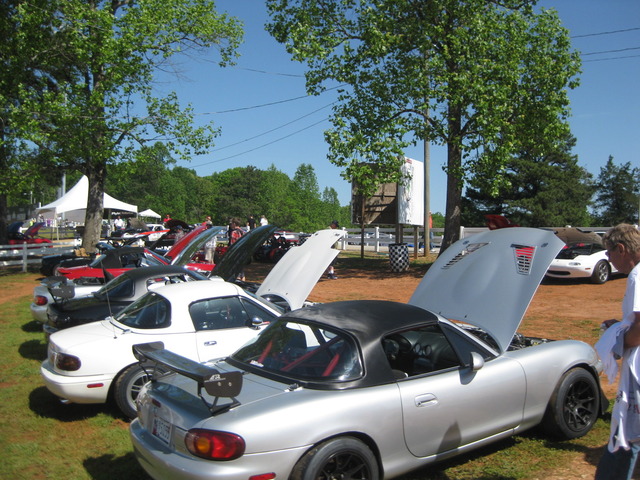
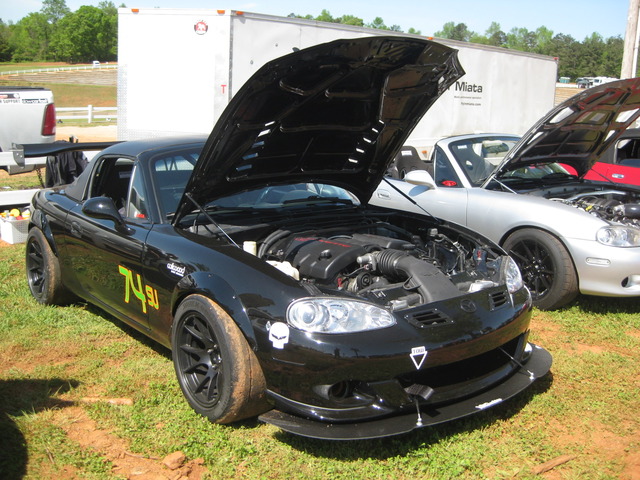
First the photos. Here's evidence that nearly two dozen V8M's in one place is a good thing. Not sure about The Mitty 2016, but hopefully we will have another big group showing up to make this an annual event for folks. Great cars - nice people as well - of course!!
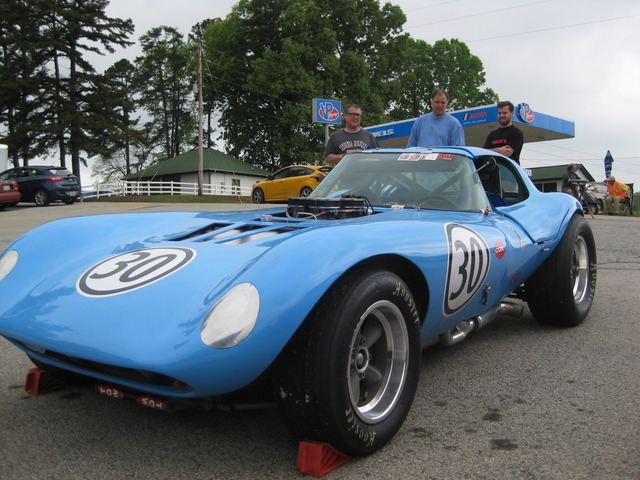
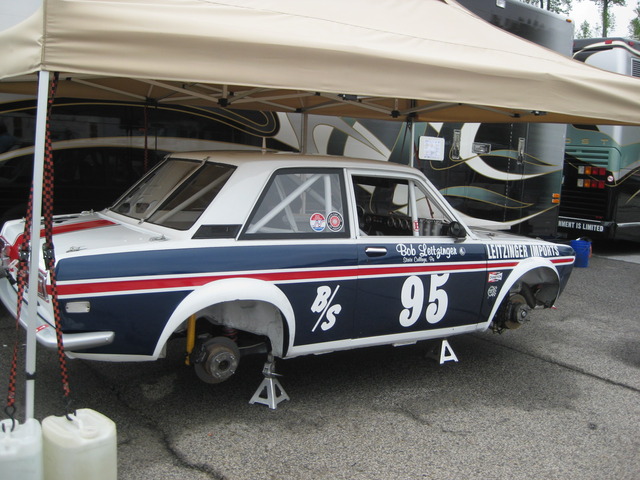
Now to my recent concern... This V8Miata now has approx. 2900 miles and was out for a "spirited" drive last weekend with 30 yr-old nephew at my side for his first ride in this thing. In a fast, second gear climb up a short hill after making a right hand turn, the Roadster jerked sideways a bit and startled me somewhat. Eased up on the throttle, thought perhaps I hit oily spot or wet spot on the road and rear end broke free for few feet - no big deal. Good thing we slowed down as random sheriff's car was coming towards us past the next corner!!!
Within the next 1/2 mile, I realized that my steering wheel was no longer centered and the car was pulling a bit to one side. Damn! Pulled off the road and we inspected the front tires to see if one had gone slack REAL FAST. And nope, they looked good. So we ease the 6 miles back home and put it away.
So this weekend, I checked front and rear suspension out to see what's up. Car still pulls to one side AND when you nail the throttle, the rear end sort of kicks to the left and handling is wonky for those brief moments.
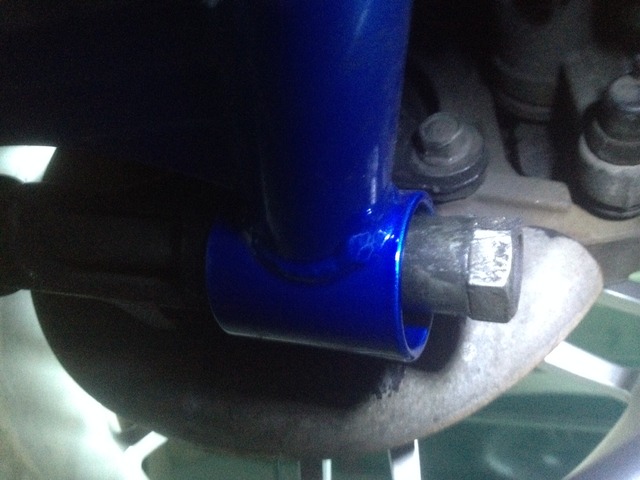
Jacked it up from the rear and found this:
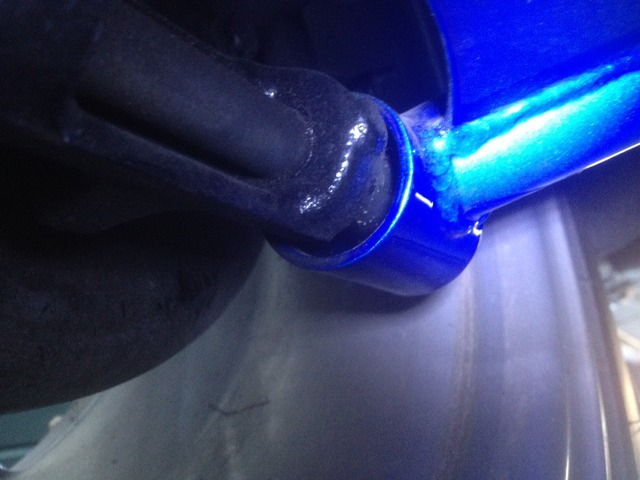
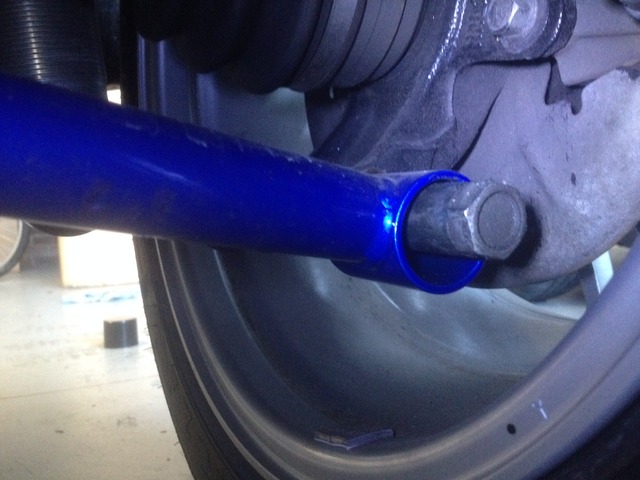
As you may be able to see, my LH lower control is missing its front bushing. Gone, outta here, see ya later, MIA.., you name it - it took a recent hike and moved to another ZIP code. Darn bushing.
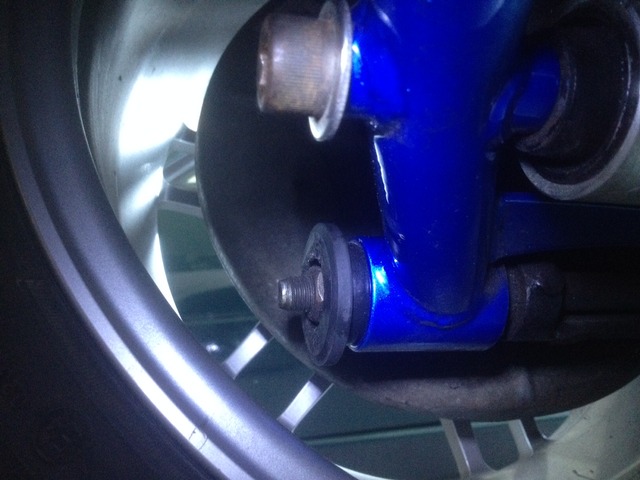
So, I'll reach out to V8Roadsters and see how Shandelle can assist with selling and shipping me new ones. Might as well get a few more extras on hand.
My big question is... DID I leave off necessary washers that would secure on both outer ends of this long bolt that would keep said bushings from walking out?? That's what I'm thinking. I'll have to look under my stock '91 BRG to see what's different there. See how the rear LH lower bushing in above pic is trying to walk its @ss out? A washer would stop that, I would think.
Oh well, this will be an easy repair. And, I'll want to correct both sides. My RH side looks normal with bushings in place - just the LH side went wonky on me!
First the photos. Here's evidence that nearly two dozen V8M's in one place is a good thing. Not sure about The Mitty 2016, but hopefully we will have another big group showing up to make this an annual event for folks. Great cars - nice people as well - of course!!


Now to my recent concern... This V8Miata now has approx. 2900 miles and was out for a "spirited" drive last weekend with 30 yr-old nephew at my side for his first ride in this thing. In a fast, second gear climb up a short hill after making a right hand turn, the Roadster jerked sideways a bit and startled me somewhat. Eased up on the throttle, thought perhaps I hit oily spot or wet spot on the road and rear end broke free for few feet - no big deal. Good thing we slowed down as random sheriff's car was coming towards us past the next corner!!!

Within the next 1/2 mile, I realized that my steering wheel was no longer centered and the car was pulling a bit to one side. Damn! Pulled off the road and we inspected the front tires to see if one had gone slack REAL FAST. And nope, they looked good. So we ease the 6 miles back home and put it away.
So this weekend, I checked front and rear suspension out to see what's up. Car still pulls to one side AND when you nail the throttle, the rear end sort of kicks to the left and handling is wonky for those brief moments.
Jacked it up from the rear and found this:


As you may be able to see, my LH lower control is missing its front bushing. Gone, outta here, see ya later, MIA.., you name it - it took a recent hike and moved to another ZIP code. Darn bushing.


So, I'll reach out to V8Roadsters and see how Shandelle can assist with selling and shipping me new ones. Might as well get a few more extras on hand.
My big question is... DID I leave off necessary washers that would secure on both outer ends of this long bolt that would keep said bushings from walking out?? That's what I'm thinking. I'll have to look under my stock '91 BRG to see what's different there. See how the rear LH lower bushing in above pic is trying to walk its @ss out? A washer would stop that, I would think.
Oh well, this will be an easy repair. And, I'll want to correct both sides. My RH side looks normal with bushings in place - just the LH side went wonky on me!
#222
Pat, another Great post. Always enjoy all the picts. I used to drive my 62 E-Type to SCCA events in my area back in the 70's and your photos sure bring back those days (I was only a spectator).
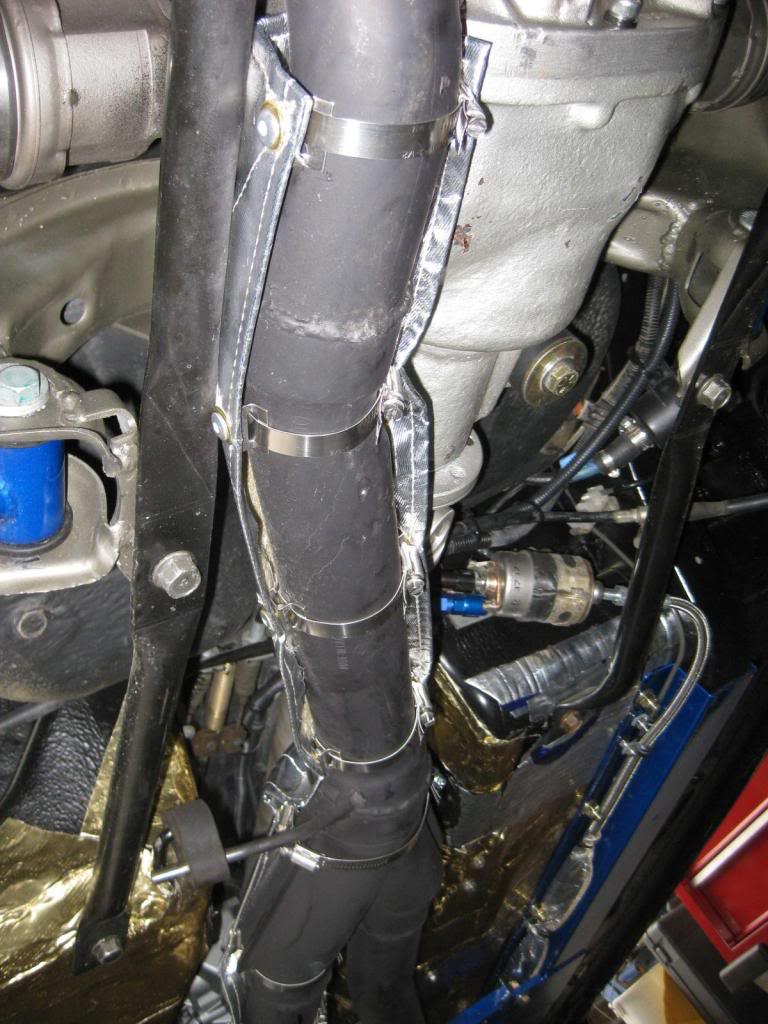
Quick question, how did the clamp on exhaust heat shielding work? I need to do some additional heat mitigation and that's the next step for me.
Thanks, RR
Quick question, how did the clamp on exhaust heat shielding work? I need to do some additional heat mitigation and that's the next step for me.
Thanks, RR
#223
Pat, another Great post. Always enjoy all the picts. I used to drive my 62 E-Type to SCCA events in my area back in the 70's and your photos sure bring back those days (I was only a spectator).
Quick question, how did the clamp on exhaust heat shielding work? I need to do some additional heat mitigation and that's the next step for me.
Thanks, RR
Quick question, how did the clamp on exhaust heat shielding work? I need to do some additional heat mitigation and that's the next step for me.
Thanks, RR
Yes, the exhaust heat shielding from Summit Racing (DEI brand, I think) has been excellent. No pressure build up in the tank like some have experienced with their V8 exhaust "cooking" the tank. This shielding is about 30" long and is pulled up even with the Ford diff so I think it's blocking heat at the rear end as well. Car interior stays about as cool as a 1.8L Miata when running around town or on the highway. Best regards, Pat
#224
Yikes! Glad that happened so close to home! Looks to me like your hunch is right there is really nothing to hold those bushings in with out some sort of washer one each side.
The good news is you are finally are doing some spirited driving to shake her down!
The good news is you are finally are doing some spirited driving to shake her down!

The following users liked this post:
ToySnakePMC (08-09-2015)


